Designs

Presenting the Colour Block Cowl

More autumn excitement from me today as I am thrilled to present my latest pattern release with you. Things feel especially autumnal today - as I write this midmorning it’s still incredibly dark outside (I even have the big light on) and the rain is lashing down against the windows. Just right for thinking about cosy autumn knits.

The Colour Block Cowl was knit using 50g of contrast yarn for the 'colour blocks' and a 5 x 20g set of ombre mini skeins for the main colour.

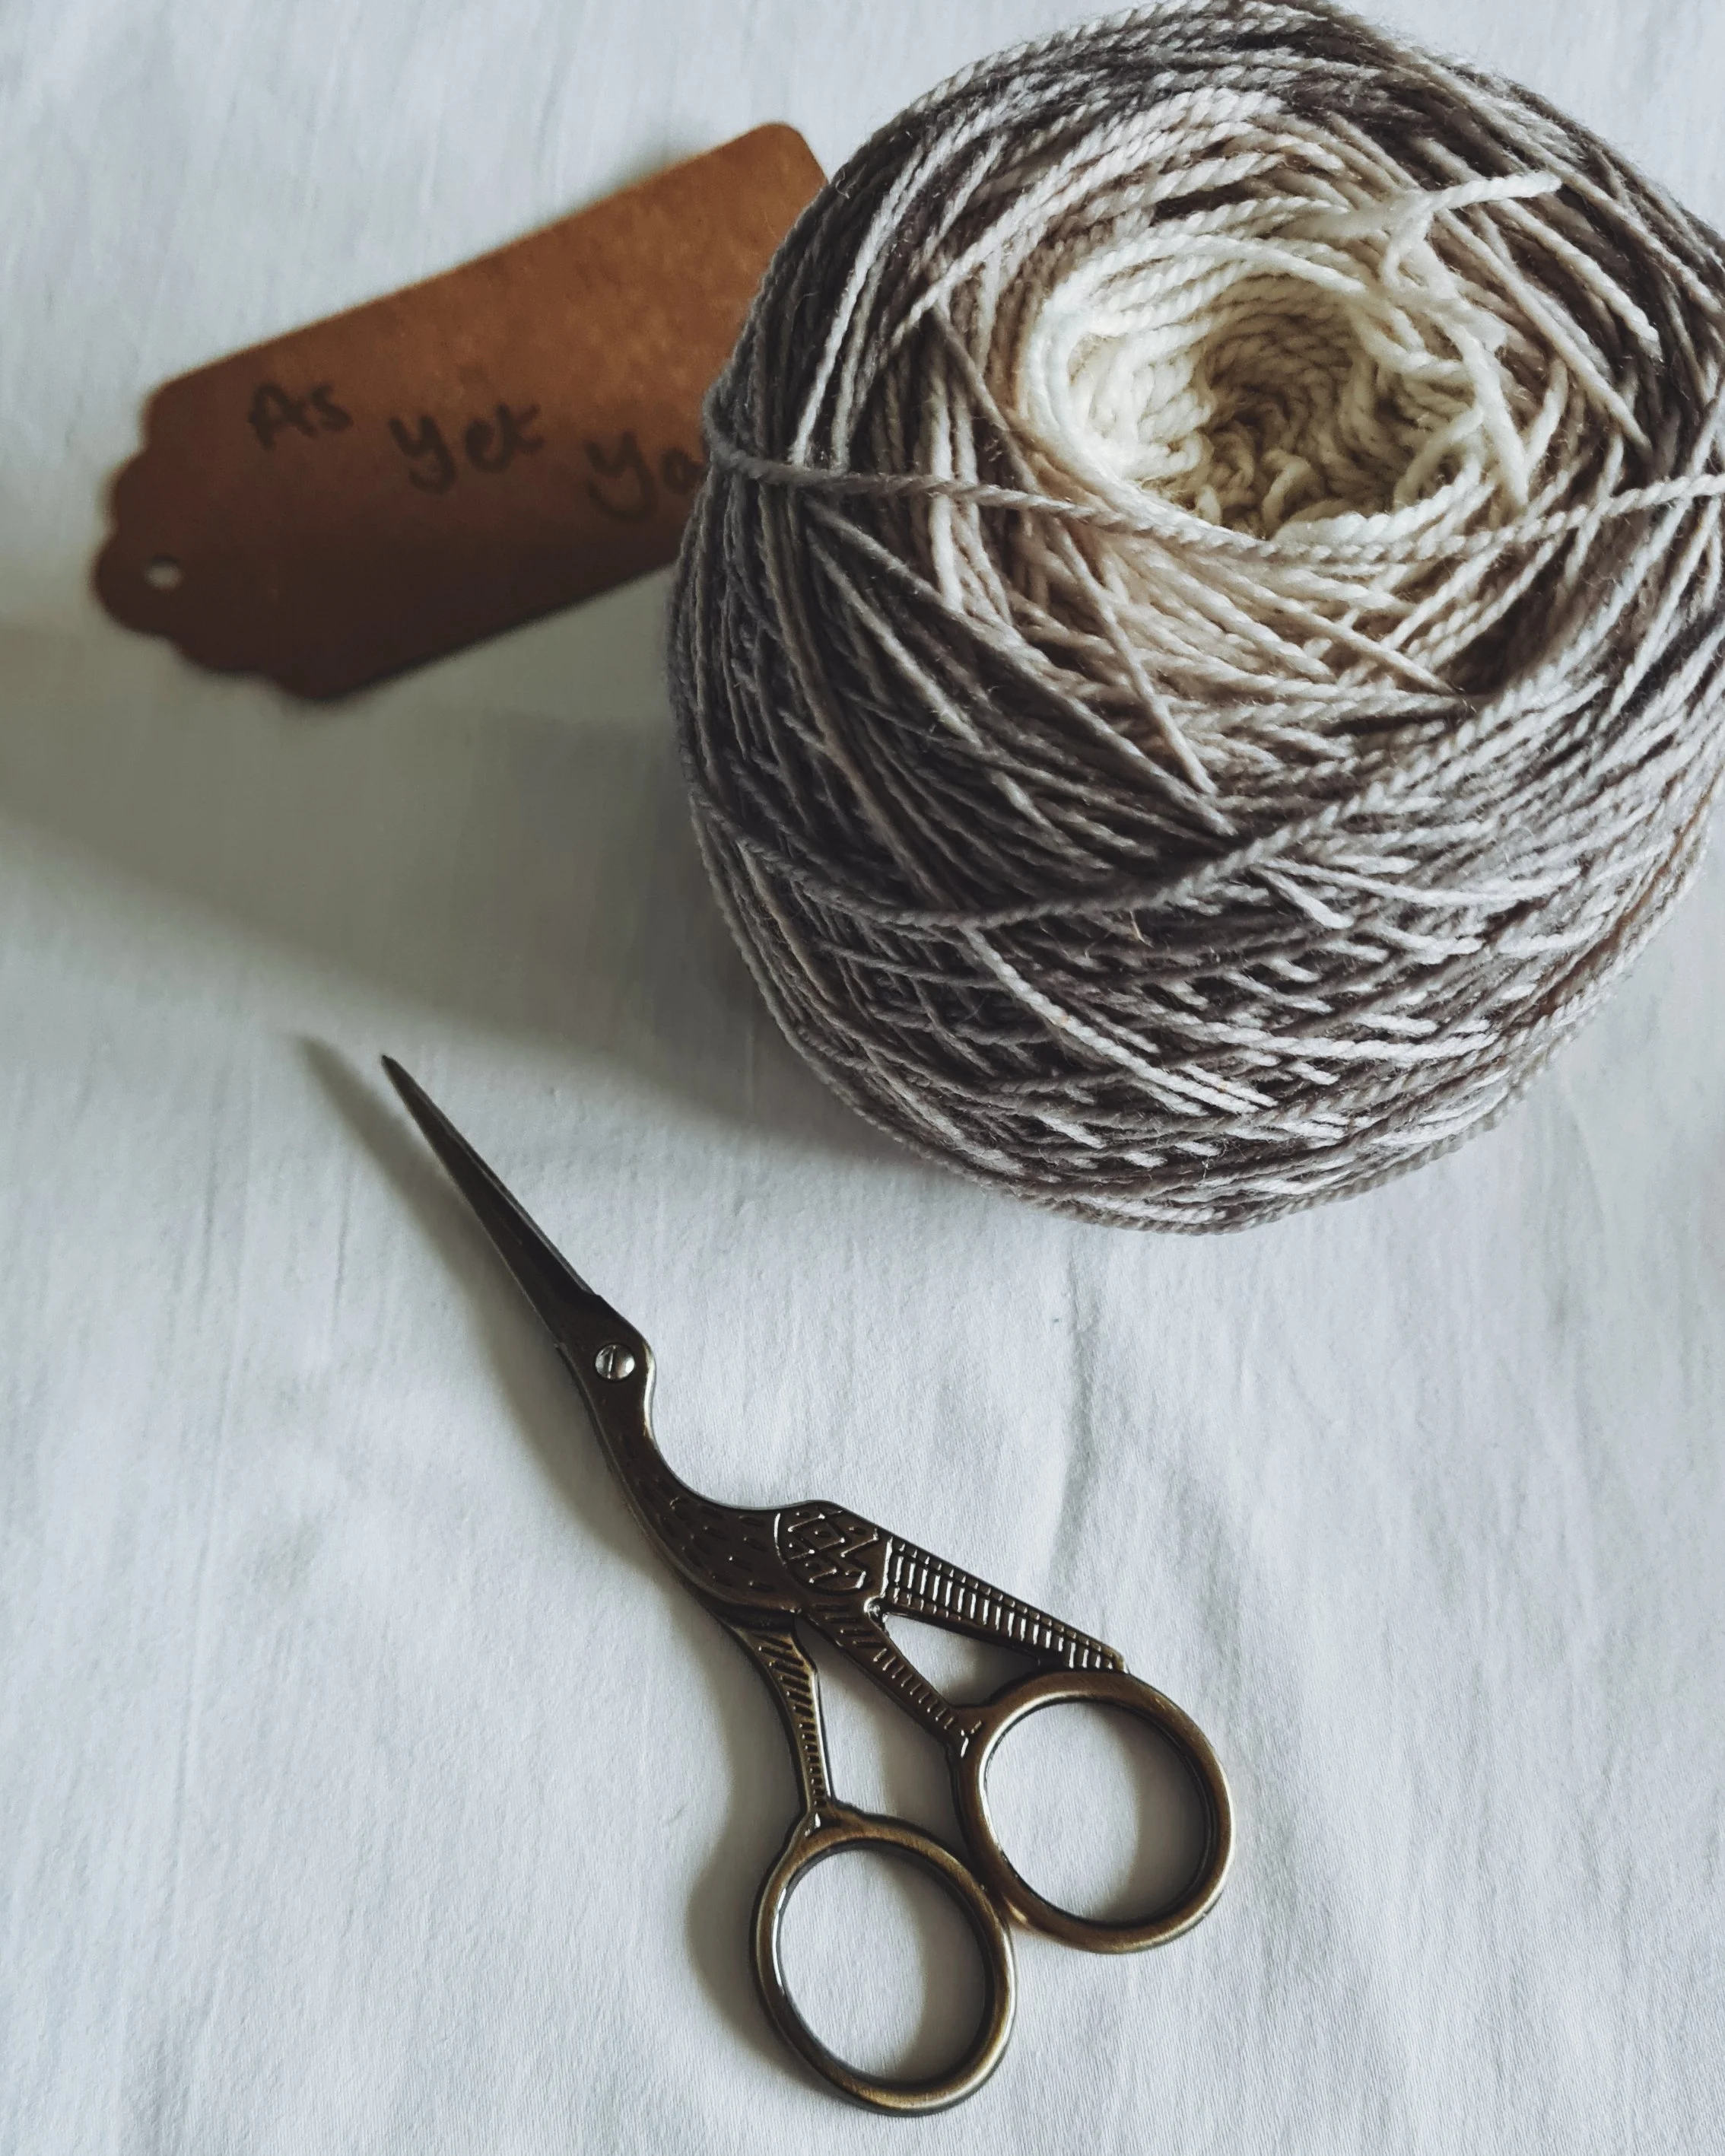
I chose to use a mini skein set from As Yet Yarns, colourway Volcanic Mist, a gorgeously subtle gradient from lightest cream to mid grey. 

For ease of knitting and so that nothing interrupted my 'flow' I wound the mini skeins into a cake before I started. I used the Magic Knit technique for this. If you'd like to try it there's a short tutorial up on my blog to show how I did it.

The cowl is a really straightforward knit with lots of stocking stitch - and it's ideal as a base to practice your colourwork on. You could knit the body of the cowl a little shorter if you prefer. As it is I had about 15g left over and I love that it is deep enough to wear folded over for extra warmth.

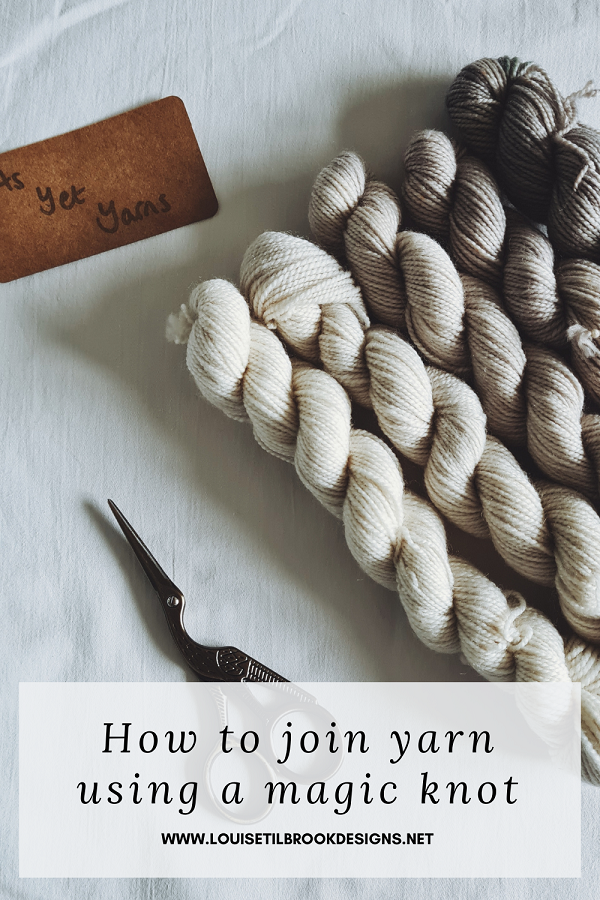
PIN FOR LATER

How to make a magic knot

There are many methods available to join two strands of working yarn in knitting. The magic knot method is just one of them. I used the magic knot technique to join 5 x 20g mini skeins together into a single ball. Here I’m using an ombre mini skein set from As Yet Yarns in colourway Volcanic Mist

You can of course just knit with each mini skein individually but winding it all into a single cake first makes for a very relaxing and soothing knit - also ideal if you are travelling or will be knitting on the move.

It looks like there are a lot of steps to the process but once you get the hang of it, it takes just seconds to do.

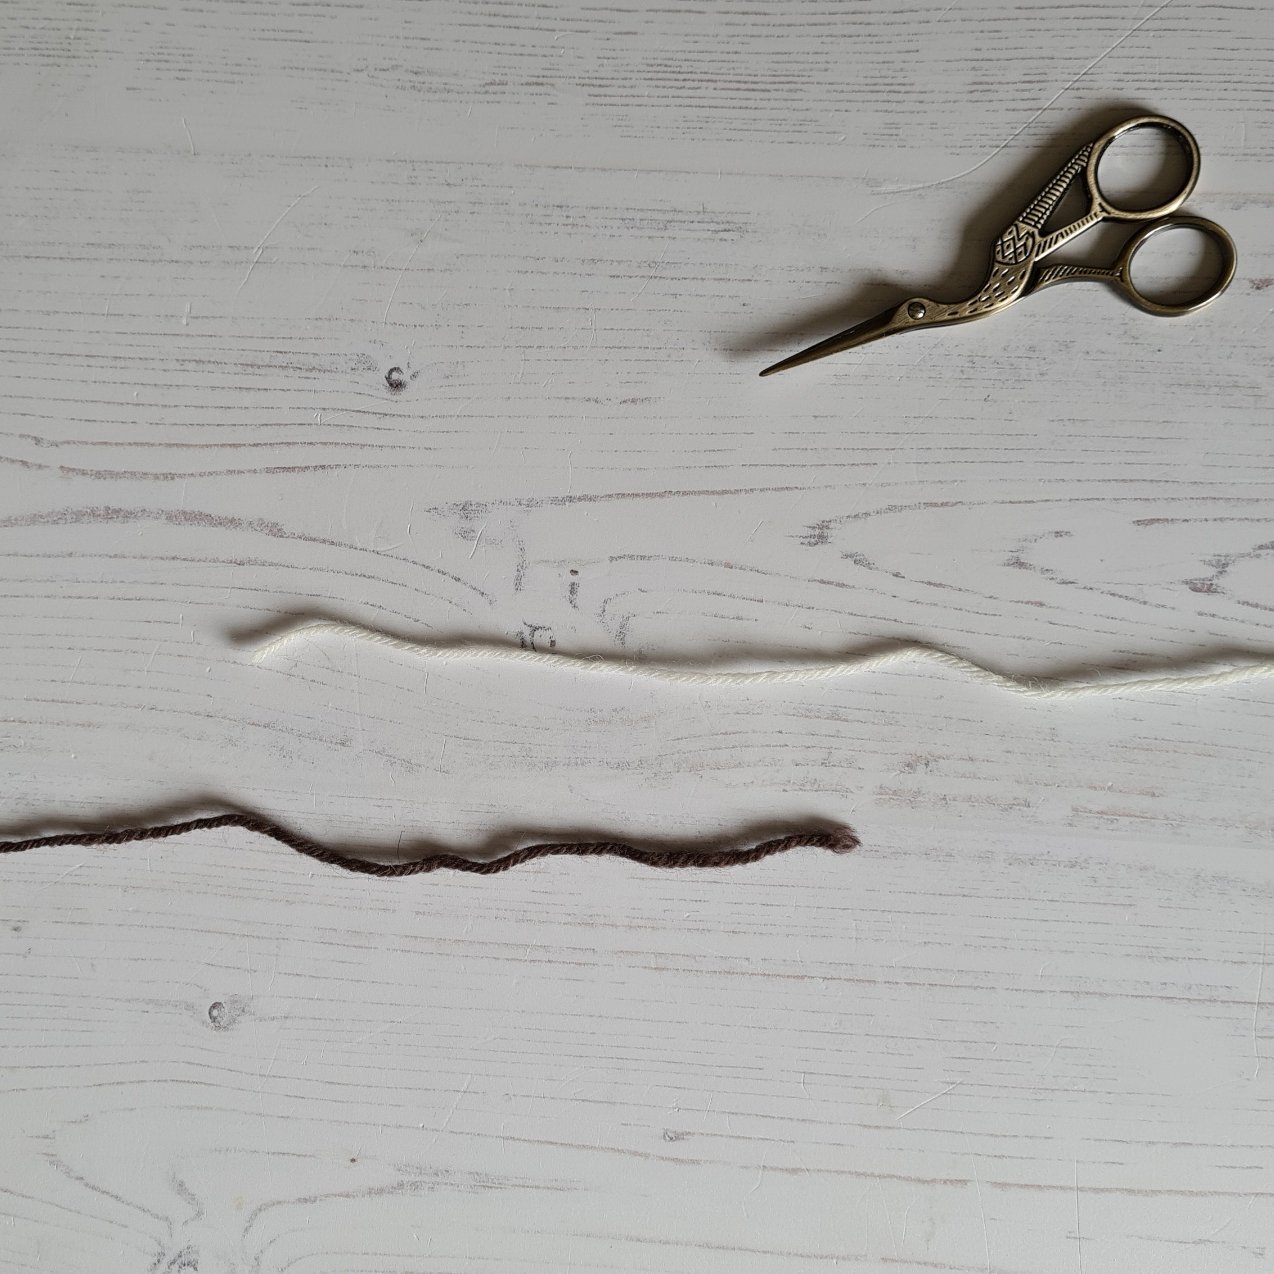
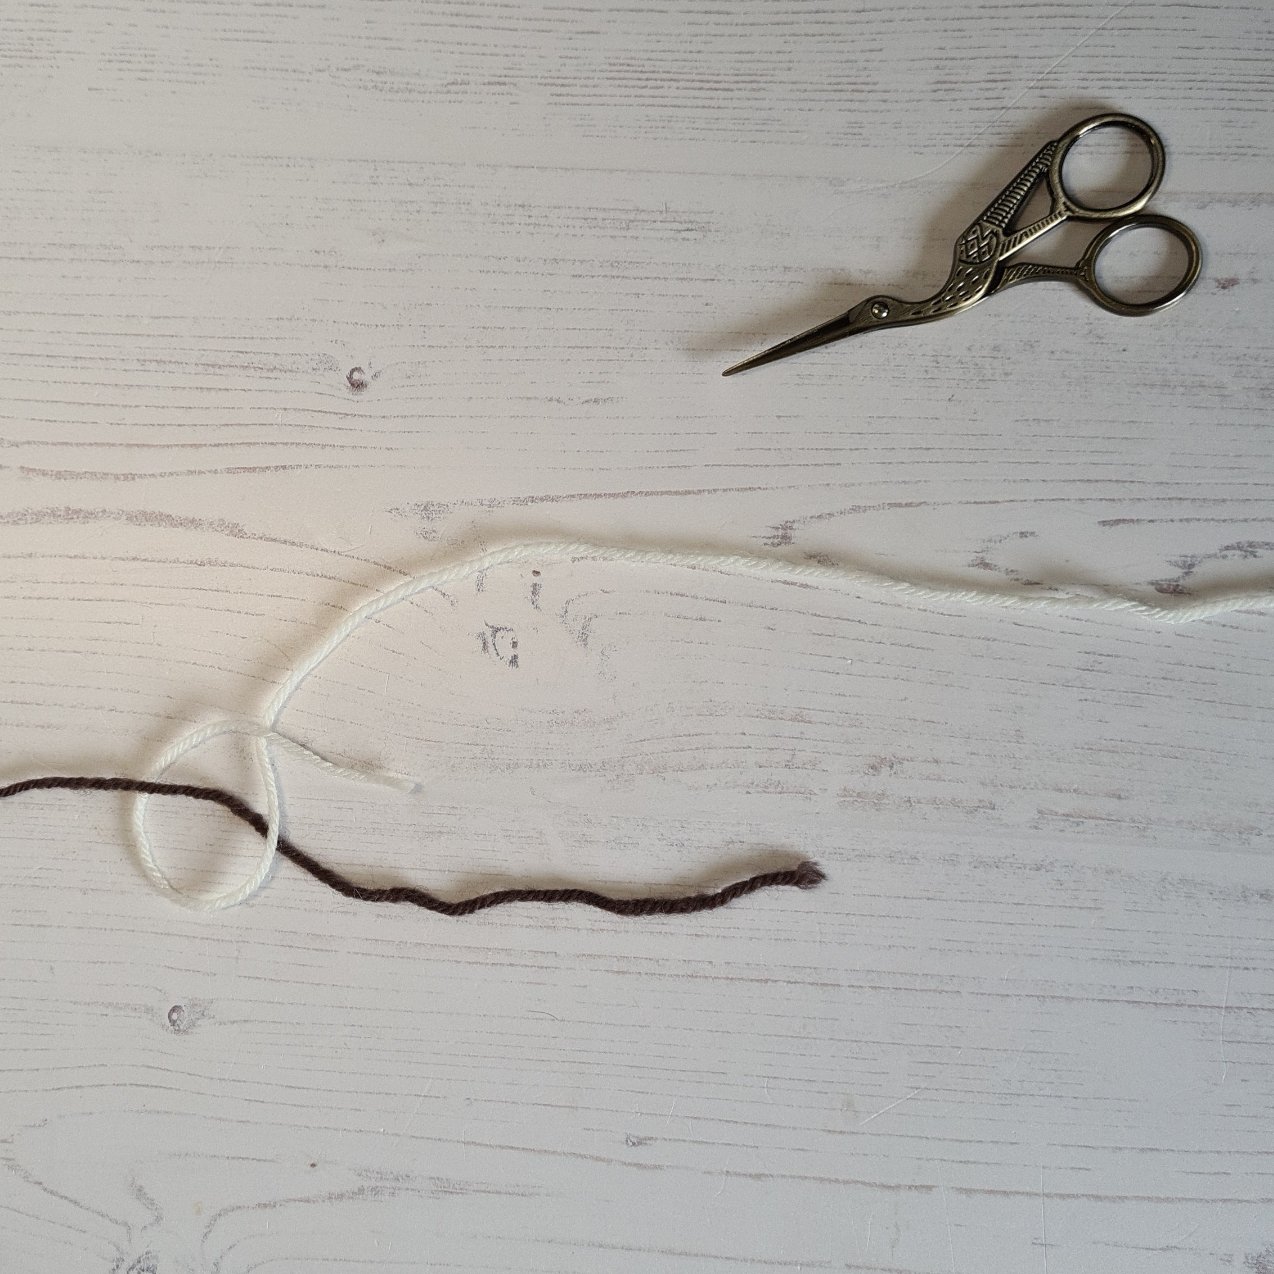
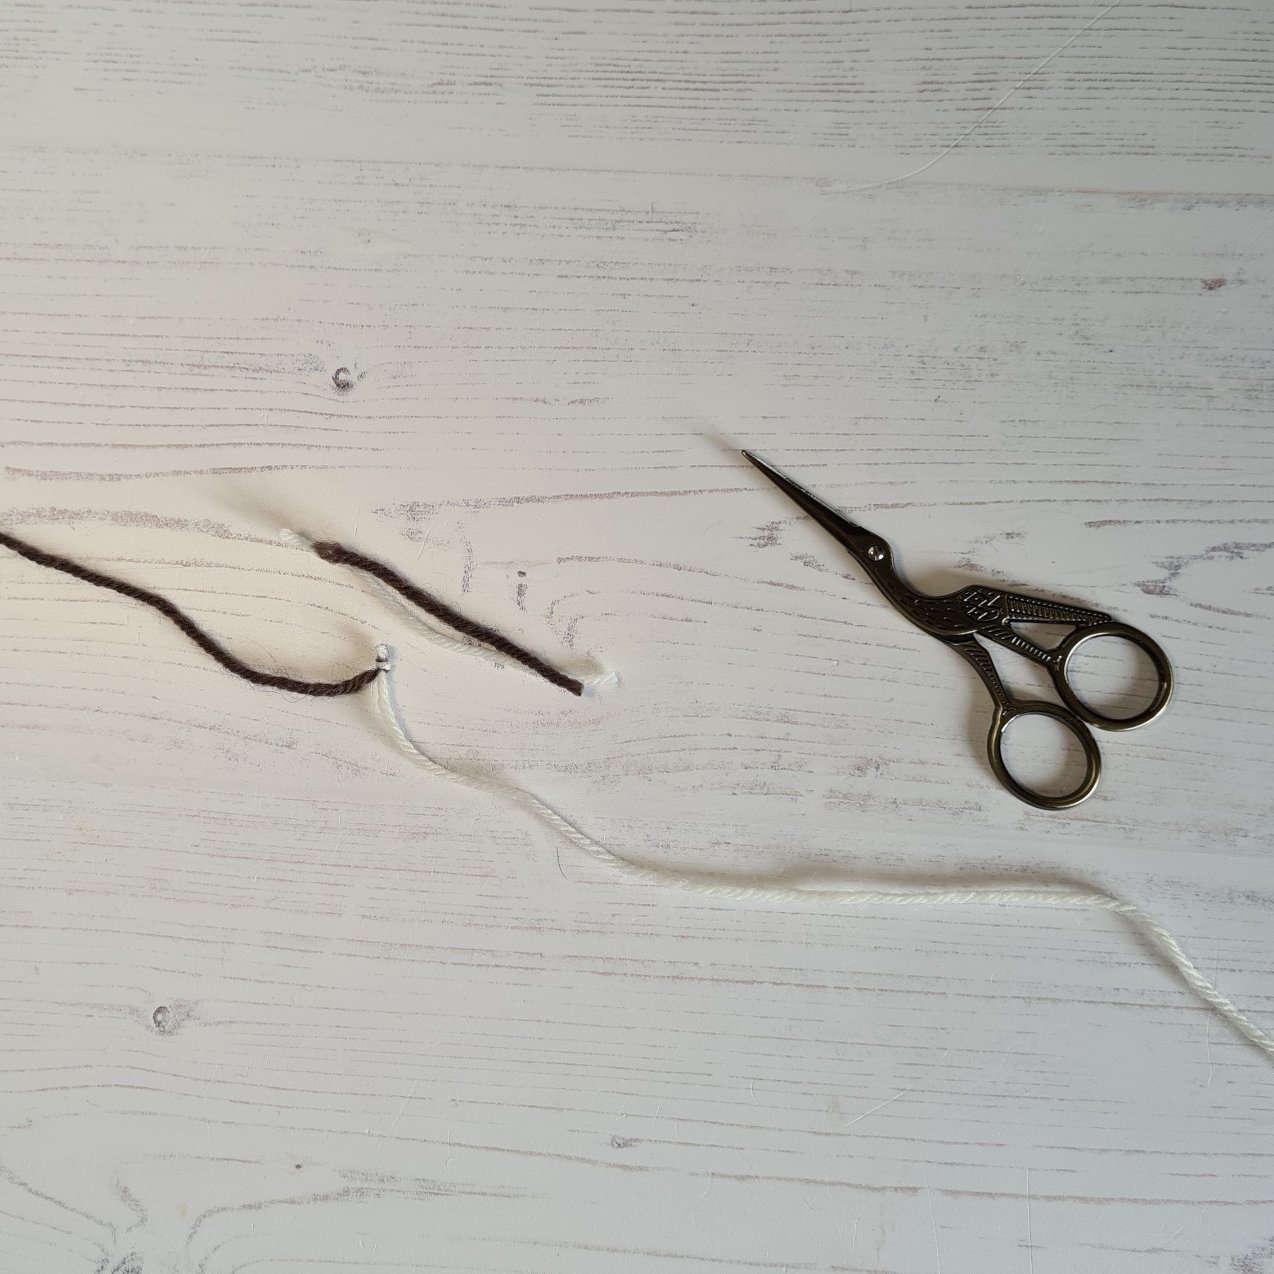
  1. You’ll need at least a 5” tail from both yarns

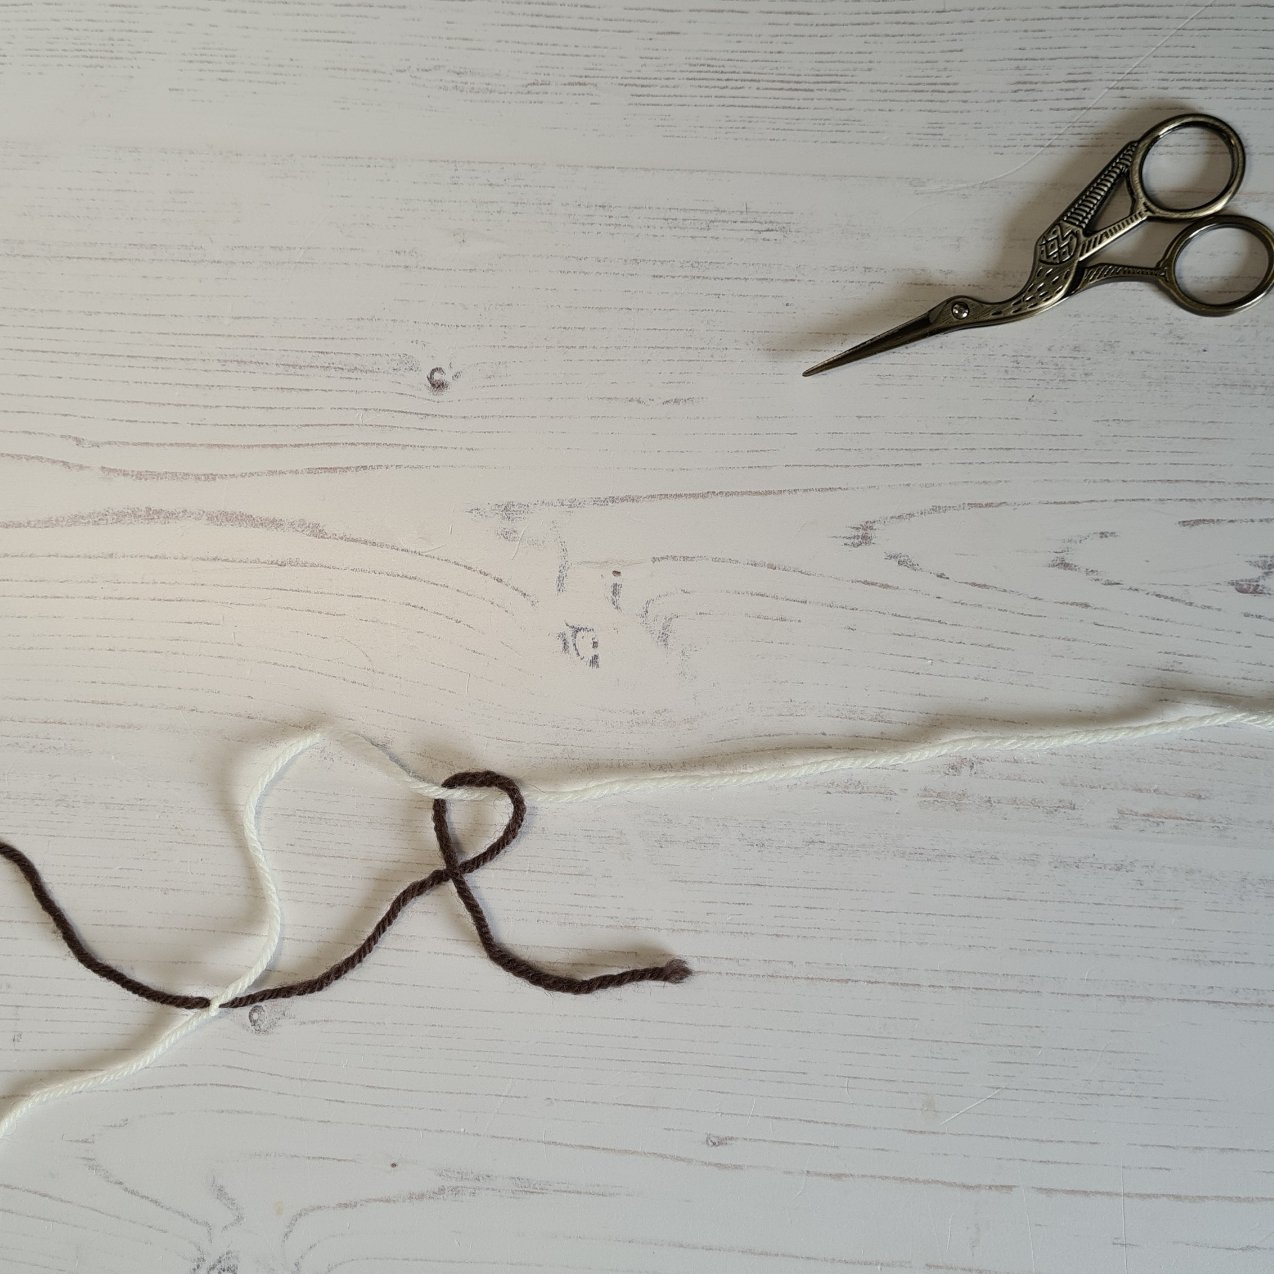
  2. Lay the top yarn over the bottom one

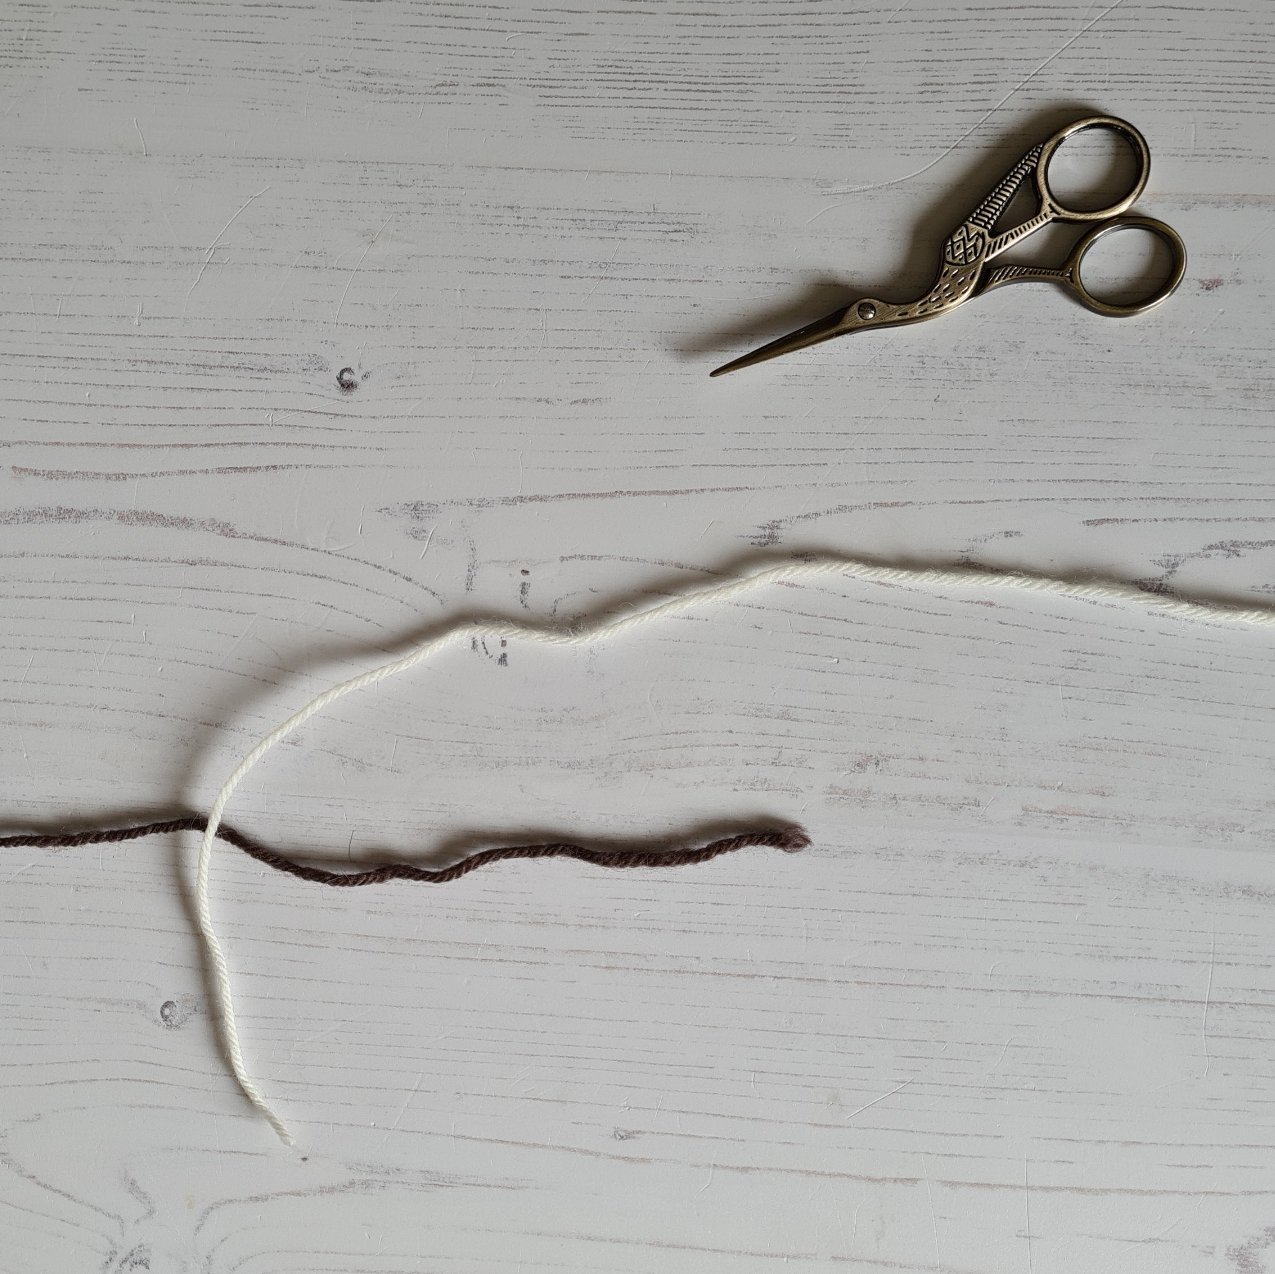
  3. Pull the top yarn under the bottom one

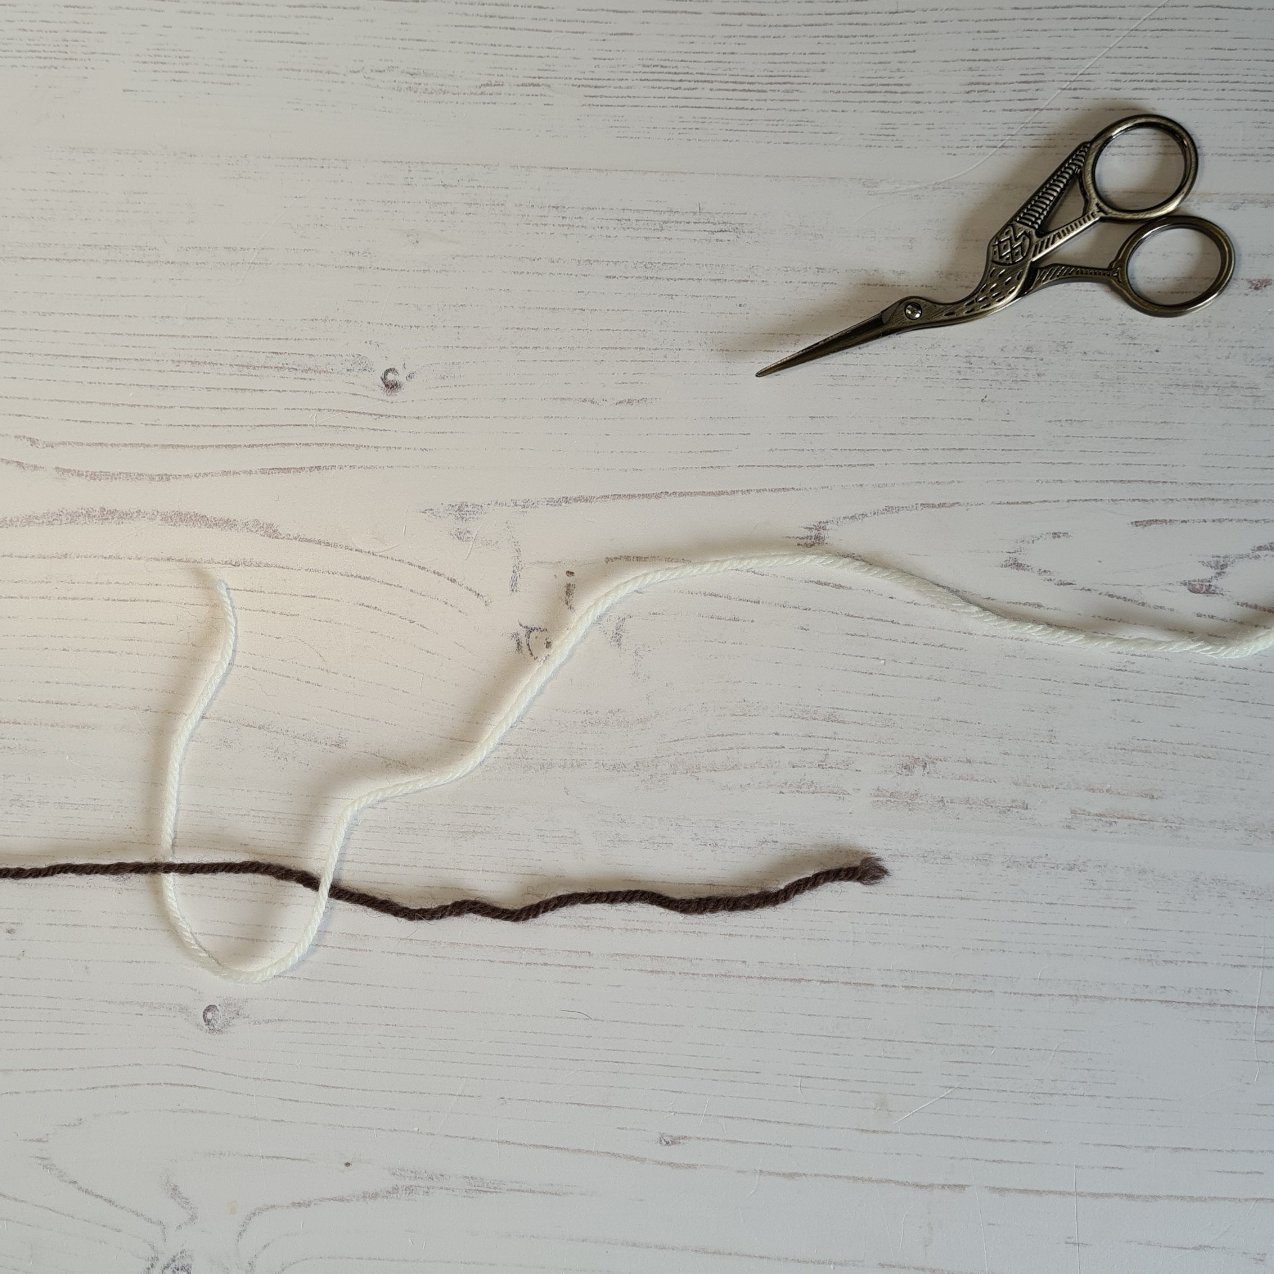
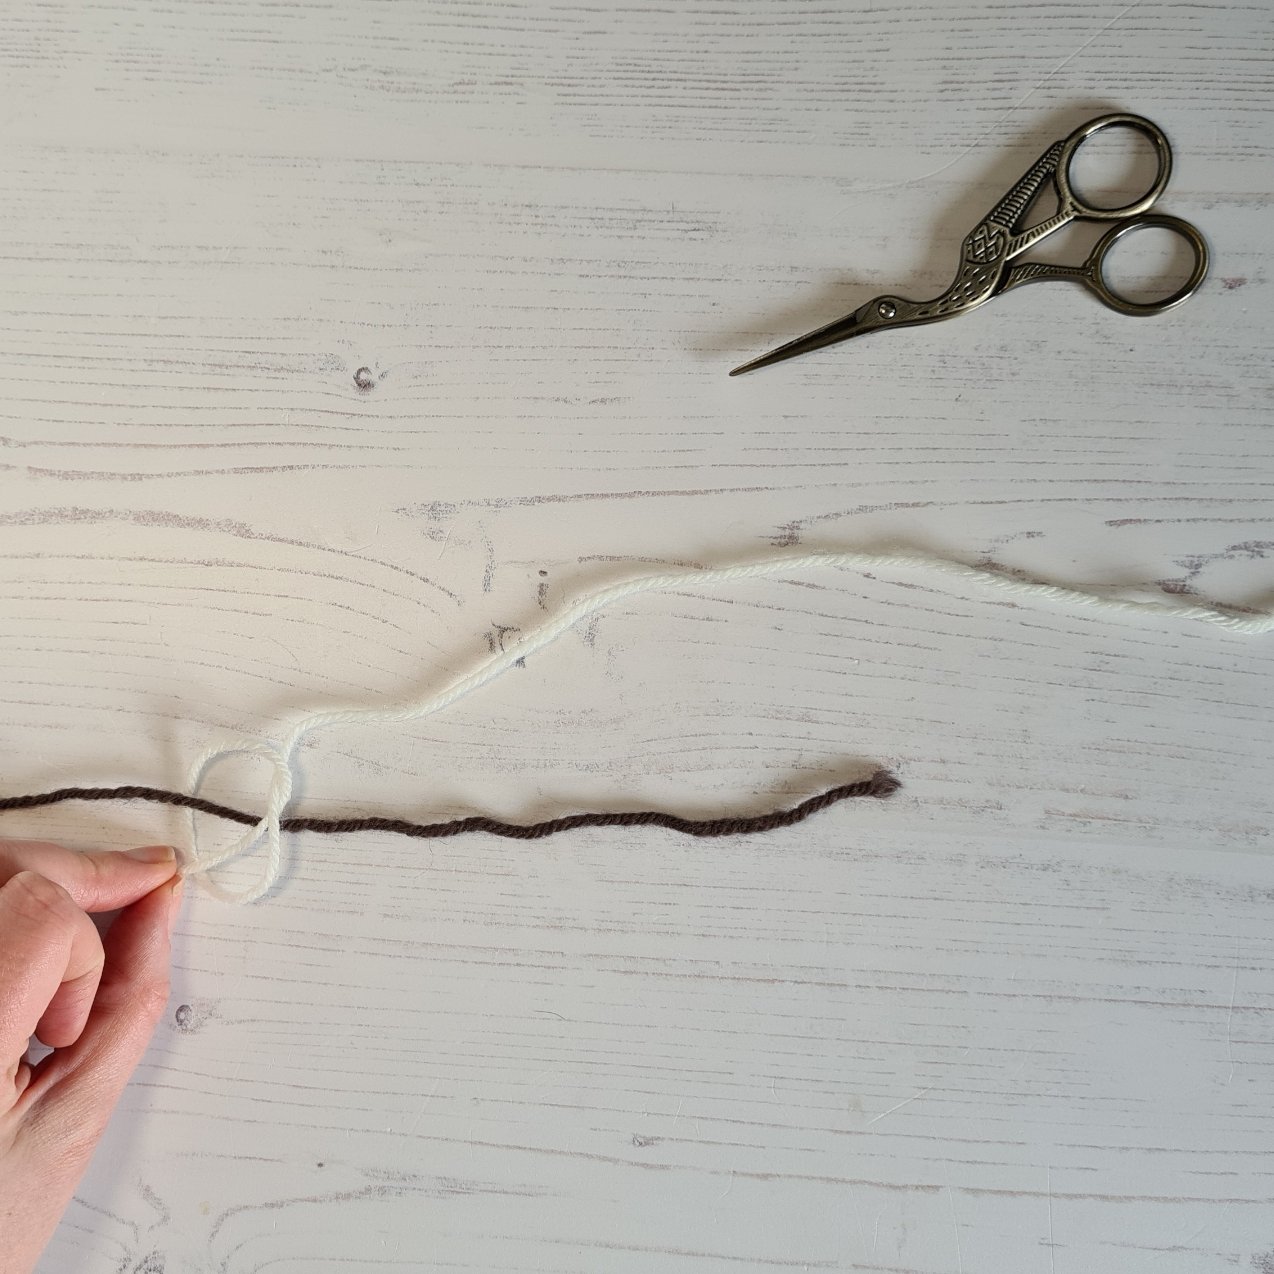
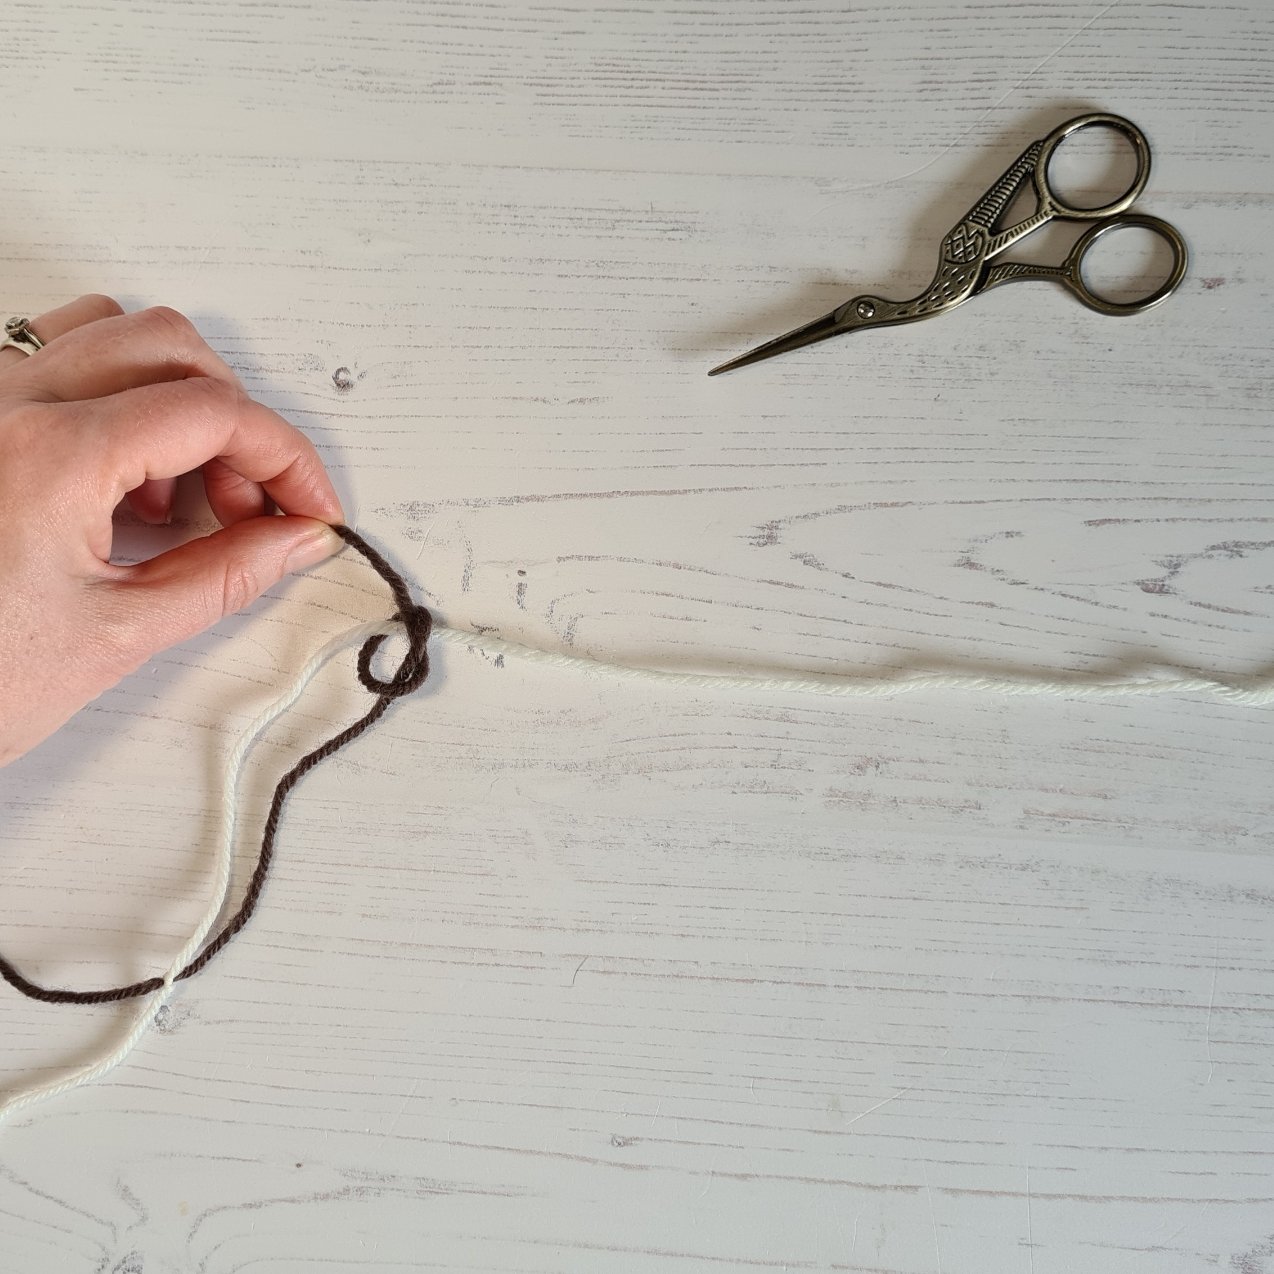
  4. Make a loop with the top yarn

  5. Pull the tail through that loop, coming up from below

  6. Pull knot tight, that’s the first side done

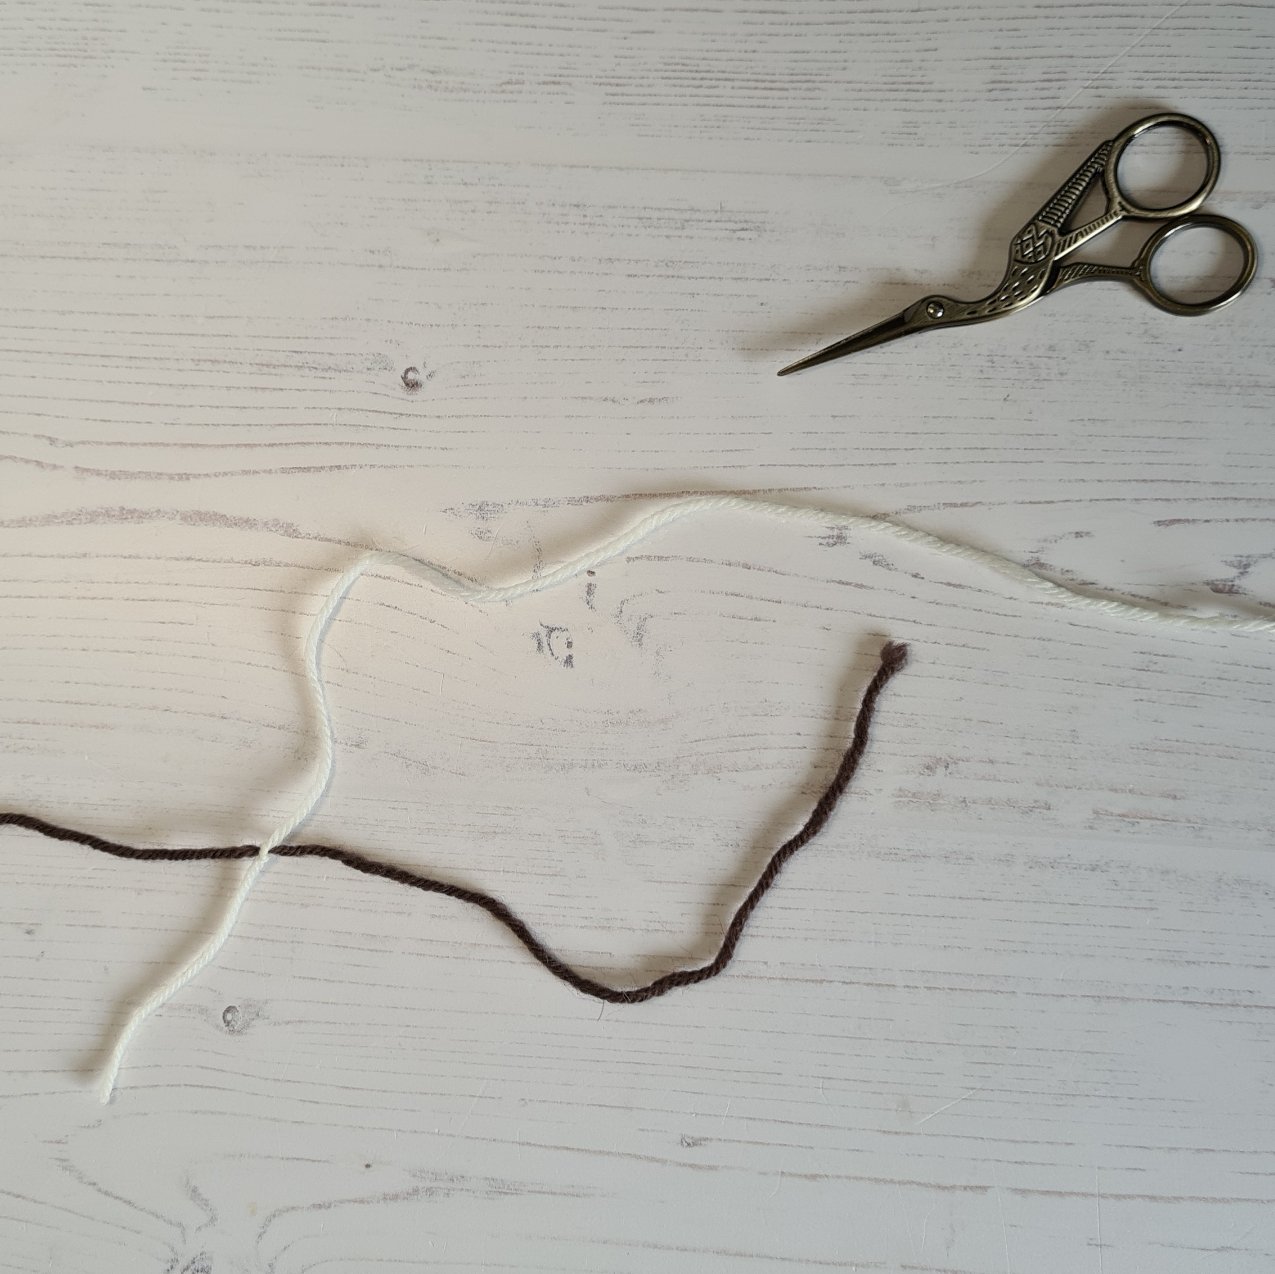
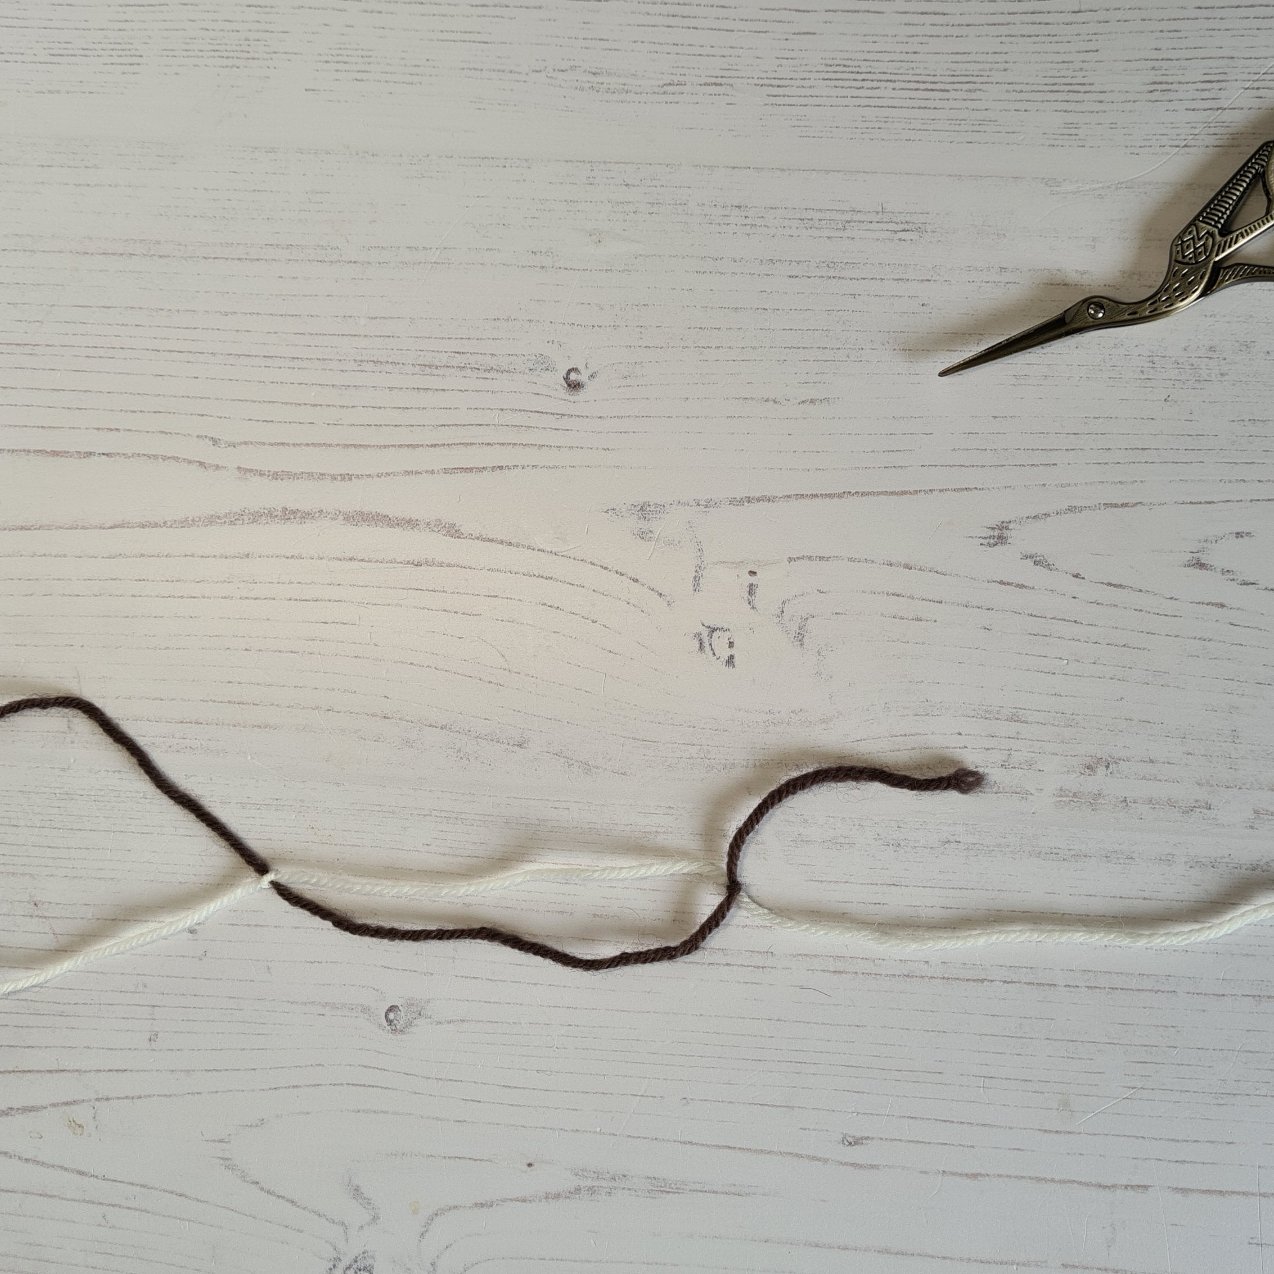
  7. Lay the bottom yarn over the top one

  8. Make a loop with the bottom yarn

  9. Pull the tail through the loop, again coming up from below

  10. Pull knot tight

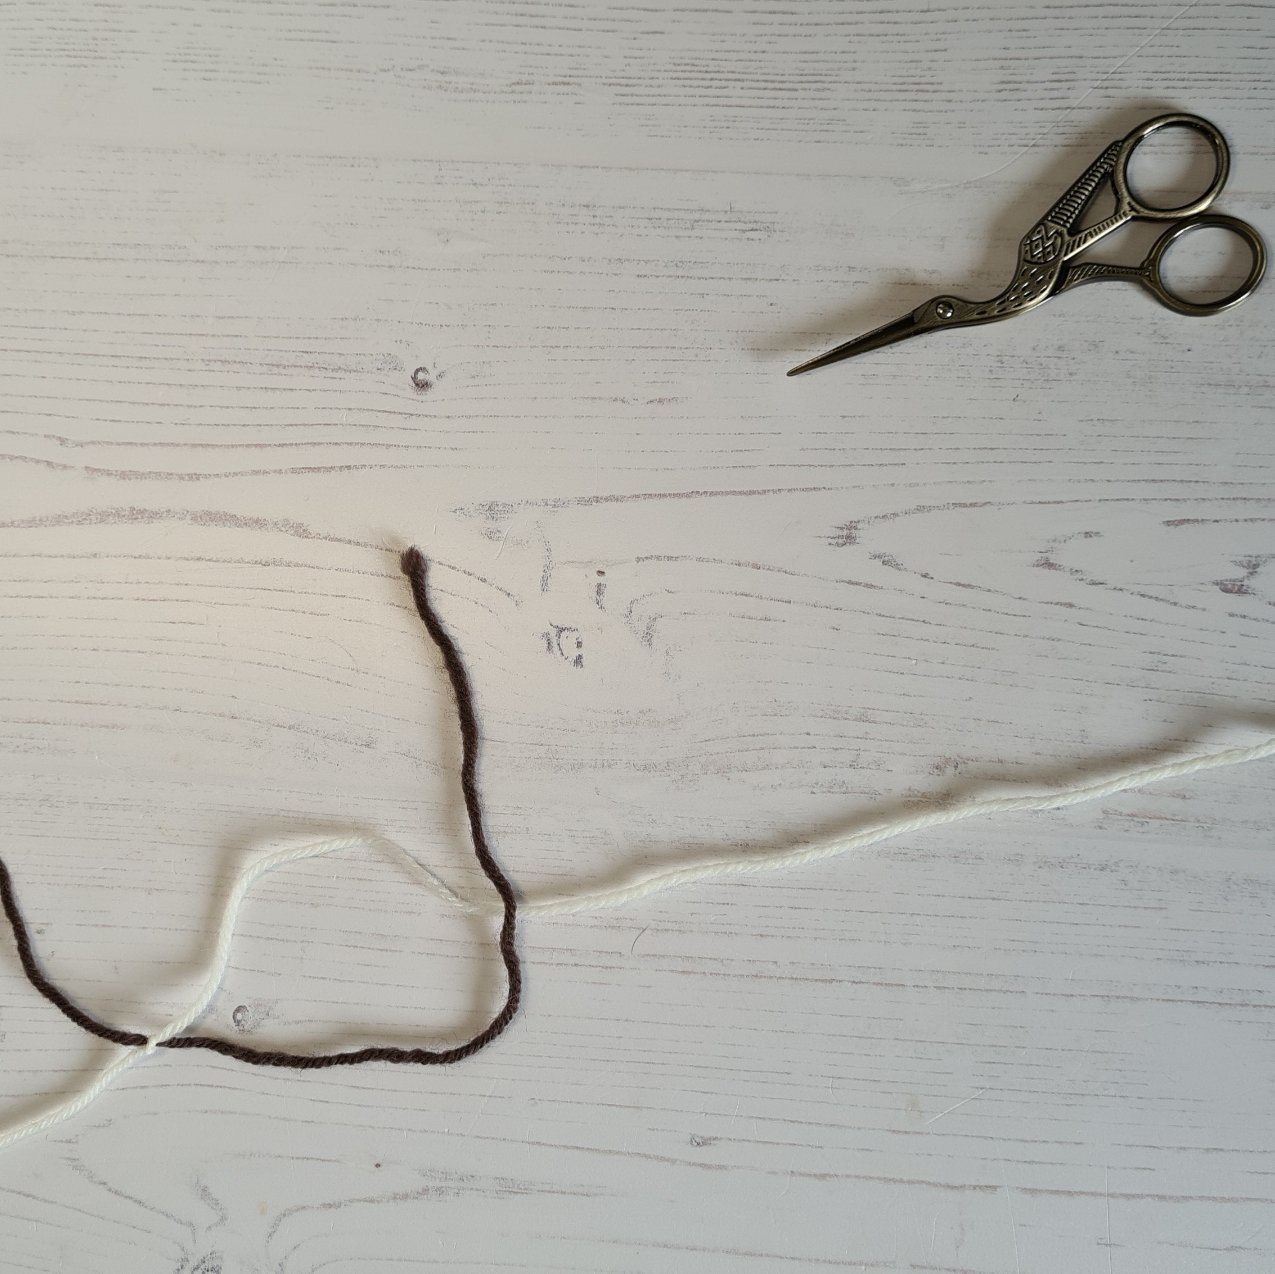
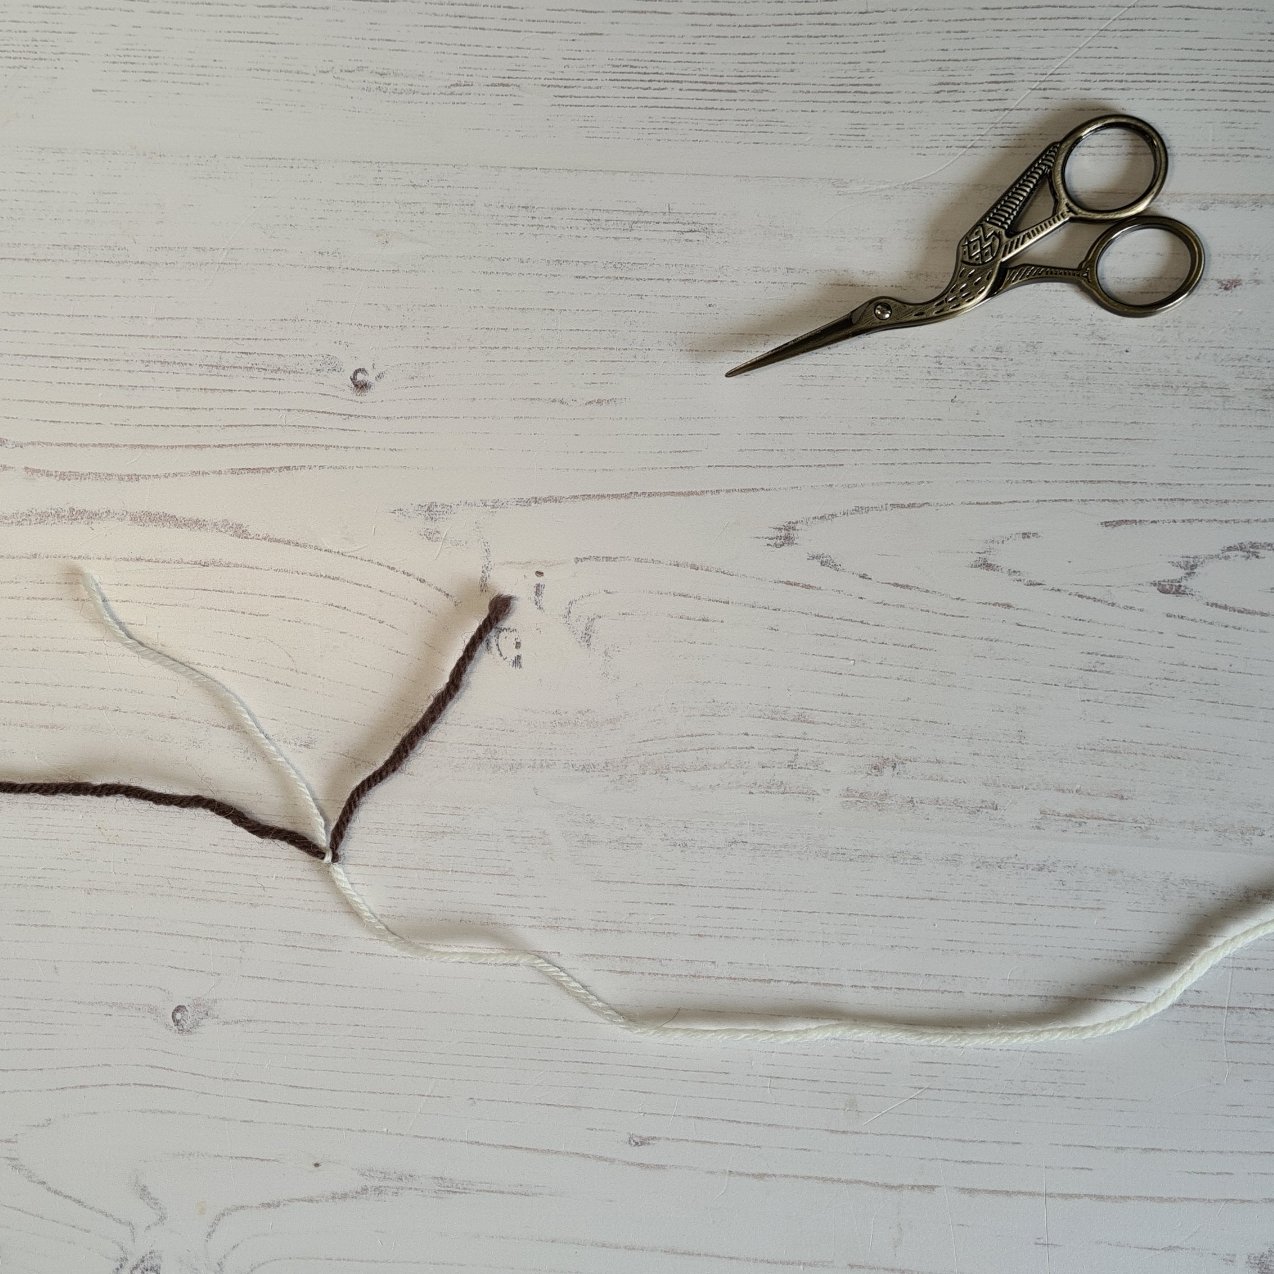
  11. Pull firmly on the ends of both knots - these will move them towards each other

  12. Continue to pull until both knots are snug against each other. Pull tight and the snip the ends

PIN FOR LATER

Who wears shawls anyway?

It’s a valid question to be fair. And one which, back in my non-knitting days I would have struggled to answer. It’s true that if you are thinking of shawls as something brown and rustic, worn over the shoulders, pointed end at the back and the fronts crossed over one’s bosoms (a la Clare Fraser in Outlander) then the answer is probably “very few”.

But as a knitter you’ll know that’s a very narrow definition of the word shawl and that there are far more imaginative shapes that can be conjured up with yarn and needles, to say nothing of the different ways to wear them.

In fact it’s a fair bet that at some point in the last week or two you have encountered someone in the street wearing a shawl - it just might not have looked like one.

My favourite way to wear a shawl is bandana style - holding the pointed end in front of me and wrapping the ends behind me - to hang down on either side of my neck. For this reason I tend to prefer elongated triangle shapes (where the ends or arms are longer). Asymmetric shawls are even better as they have far more wrappable potential. In the picture that accompanies this post I am wearing my kite-shaped shawl - The PPS - in just this way. This is the larger two-skein version, but in this link from Instagram I am demonstrating how I wrap the smaller version.

Worn like this, shawls are a brilliant addition to your autumn winter wardrobe. Neatly filling the gap at the top of your coat where untoward chills can creep in, they can add warmth without too much bulk. Not to mention the fact that they can add a welcome pop of colour to the dullest of ‘big coats’.

They also have the added advantage that you can keep them on inside, when you might feel obliged to shed your coat but want to stay with an additional layer of warmth in case of pesky air conditioned draughts. I can’t tell you the number of times I have been grateful for the warmth of a shawl while sitting through an interminable kids movie (although since Covid hit it’s been a very long time since I’ve done that).

In short, shawls are fun, colourful and an invaluable addition to your winter wardrobe. For the price of a single skein of sock yarn you can have the fun of knitting it, plus a whole season (and more) of draught-free warmth. Sounds like a win-win to me

An autumnal Fuss Free Festival Shawl

Recently I have been using a lot of my sock yarn leftovers in scrappy socks and blanket projects, which has been great but has meant that my supply of smaller scraps has dwindled somewhat.

So when I ran out of sock yarn scraps I shifted my attention to my bag of larger amounts of leftovers. I think we all have a bag of these somewhere - those balls where you have started something and frogged it, or used an annoying 30-40% of it - rendering it not much use for a full pair of socks or a shawl.

I dug out these contrasting greys and a burnt orange from my stash - I had around 60-70g of each of them and decided to knit a larger version of my Fuss Free Festival shawl in suitably seasonal colours..

I knew that I wanted stripes but I couldn’t decide on how to arrange them and I spent more time than I care to admit using a random stripe generator, playing with colour orders until I went a little dizzy.

Then I hit on the idea of ‘borrowing’ one of my sons D20 dice from his Dungeons and Dragons set and rolling each time I wanted to change colour - with the number on the dice corresponding to the number of garter ridges I would knit.

I didn’t want a hard line at each colour change so I phased in the new colour by knitting 2 rows of the new colour and then 2 rows of the old colour before rolling the dice to determine how wide the next stripe should be.

I was really pleased with how it turned out and I got so carried away that I ended up digging out some more grey from my leftovers bag (happily it turns out I have no shortage of grey). And in the end the shawl weighed in at a very pleasing 210g.

It’s is wonderfully warm and wrappable and might just have converted me to the way of the larger shawl. It’s big enough to be cosy, without being too big (thinking of some of those 3-4 skeins monsters that almost wear me, rather than the other way round).

Either way, it’s become a staple of my autumn wardrobe and I can definitely see another one or two in my future. I think I might need to buy my own D20 dice though - as my son has been making noises about needing his back.

An alternative Temperature Blanket

It seems to be traditional to start a Temperature Blanket in January, at the start of a new year and whilst I can see the obvious attractions of a new year, new blanket approach, when you think about it a summer start has a lot of advantages.

Starting the knitting during the warmer months (in the Northern hemisphere) has the advantage that the blanket is smaller and cooler to work on, saving the longer heavier rows for the colder months, when a pile of wool on your lap is probably a lot more welcome.

I vividly remember that my knitting slowed to a crawl during the 2020 summer as I just couldn’t face working on a large blanket project. Given that I was knitting a corner to corner blanket (with the longest rows during the summer months) this meant I had to do a lot of catch up knitting in autumn to stand a hope of finishing on time.

Starting in the summer would have completely bypassed this and would, with hindsight probably made for a much more relaxing knit.

Depending on your colour preferences and choices you might also want the warmer colours at each end of the blanket, with a cooler ones in the centre. I love my temperature blanket to death and use it a lot, but the few warm colour stripes right across the middle do annoy me slightly. Given the choice again I think I would prefer them confined to the edges.

I’ve blogged about my Temperature Blanket before, but I’ve included the link here in case you want to read up more on it, and maybe induldge in a little blanket planning of your own this summer.

And if you do decide to do a summer start, please do let me know. I’d love to cheer you on from the sidelines.


St Bees Shawl

Sometimes you just come across the perfect yarn for a pattern - and for me this one ticked all the boxes. I love a half-pi shawl but let's be honest here, those long rows towards the end can be a real motivation killer. 

Nearly 600 stitches per row is a lot of stitches, whichever way you look at it. But it's made much more fun by having a long change colour gradient to entertain you.

I'd seen cakes of this Scheepjes Whirl before but something about this colourway - Green Tea Tipple - really spoke to me. I couldn't put my finger on why until I was looking back through some old holiday photos in Cumbria and I came across a montage I had done of St Bees - a wonderful stretch of coastline where the sea colour can change daily, even hourly, depending on the weather.

I knew it would be perfect in this half-pi shawl and I love the way the colour changes work with the transition of the pattern - from deep grey garter stitch, to light and frothy lace, through to deep teal at the end.

The half-pi shape gives you a really wearable shawl. It sits nicely on the shoulders if you just want a little bit of warmth - I love mine when I’m sat at my desk in the mornings. Or for a bit more drama and drape you can fling one end over your shoulder - a broach pin would help to secure it on windy days.

Either way, it’s a great adaptable shape and if you haven’t tried a half-pi shawl before I urge you to give it a try. There’s minimal counting and only 7 increase rows in the whole thing. For the rest you are either working garter stitch or an easy-to-memorise lace pattern. What’s not to love.

As with all my patterns, clicking the link below takes you to my Payhip store. if you’d like a copy for your Ravelry library please email me at the address at the bottom of your pattern PDF and I will gift you a copy.