Designs

Have you ever knit a Princess Sole?

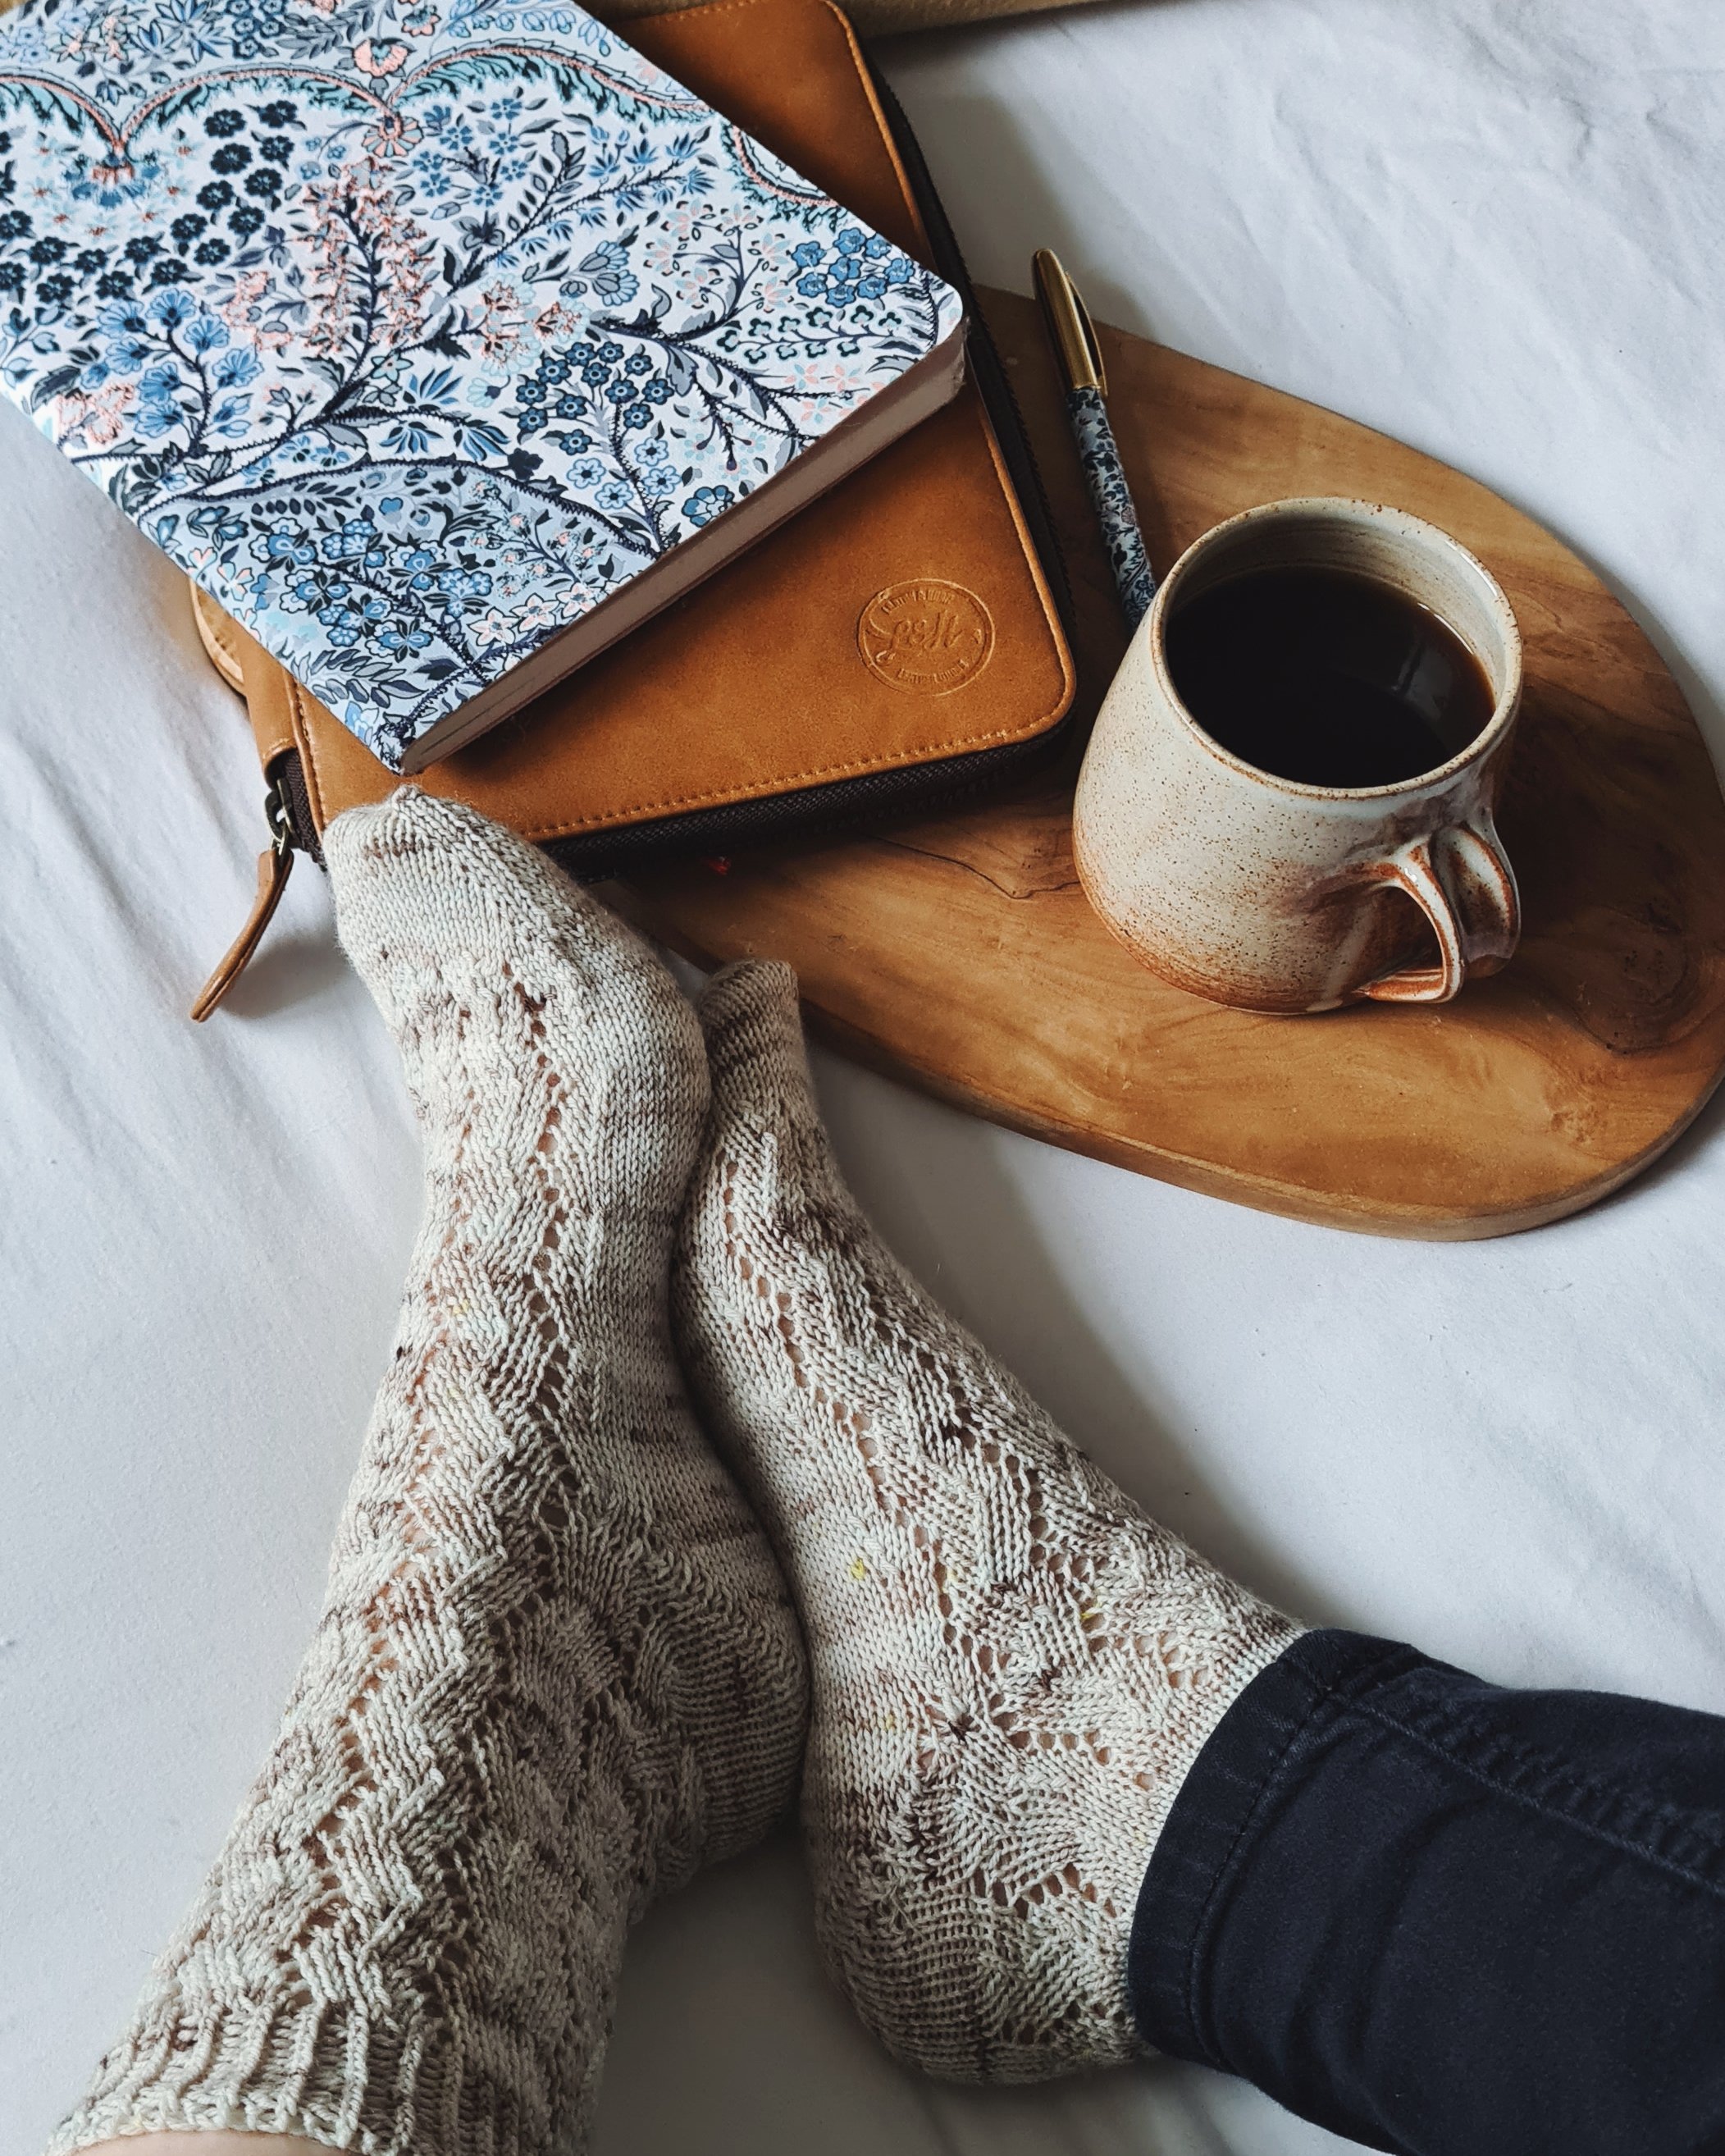
The Crow Moon socks featuring a princess sole and a garter stitch, short row heel

Have you ever knit a pair of socks with a princess sole before?

A Princess Sole is where you purl the stitches for the underside of the sock rather than knit them. This means that instead of walking on the side of the fabric that has the ‘purl bumps’ you instead have the smooth stockinette fabric against your foot.

Some people who have sensory issues with handknit socks find that this type of sole suits them much better. For myself, I don’t normally find it to be a problem except occasionally with a yarn that has a very firm, high twist.

Either way, it is a useful trick to have in your sock knitters bag of tricks. Although I feel as though I should give you fair warning and say upfront that it does mean you’ll spend more time purling in the round than you might like.

Purling the sole stitches is a straighforward practice although it does take a little bit of getting used to, especially if you are a longer term knitter used to doing a traditional sole. And if you have delicate tootsies it might well be worth a try.

The Crow Moon socks are designed with a Princess Sole in mind and have a slipped stitch demarcation between the purled sole and the textured upper part.

New Year - New Socks

Wolf Moon socks - a new design released in January 2025

In a somewhat ambitious fit of enthusiasm I have decided to give full rein to my sock knitting this year. Finally releasing some of those designs that have been either on my needles or loitering among the pages of my knitting journal for far too long.

Because I love nothing more than a year-long project I decided to fully embrace the concept and release a new sock pattern for each New Moon of 2025. There will be a mixture of toe-up and cuff down designs and I will be aiming to include a few different heel and toe options - if you are the kind of knitter that likes to ring the changes. And I’m hoping there will be something to tempt even the most experienced sock knitter.

Wolf Moon - pictured above was released at the very end of December.

Snow Moon - pictured below is the latest release on 29 January

The next one - Crow Moon - will be a toe-up design being published at the end of February.

Be sure to sign up to my email list to make sure you don’t miss a release. I normally offer an early bird price as well just for my email subscribers, so signing up ensures you won’t miss anything.

Autumnal Enthusiasm

There's a chill in the air and a distinct spring in my step - and I'm happy to report that my knitting mojo is now out of the summer doldrums and officially back in action.

There's nothing like a morning chill (and the fact that you have Raynauds syndrome) for kick starting that hunt through drawers and last years coat pockets for fingerless mitts.

As ever, I always seem to come up short of a mitt or two but luckily these colour block mitts don't take long to knit, even though they are knit in leftover sock weight yarn.

The matching cowl takes a little longer but as my old one was 'borrowed' by a friend I might be knitting myself another one of those too.

Flash Sale - 20% off patterns

If your knitting mojo has returned with a bang too, you'll want to take advantage of my flash sale - just until tomorrow I'll be offering 20% off all of my patterns.

So you can treat yourself to an autumnal themed pattern or two - or get ahead and start lining up those Christmas knits.

Use code AUTUMNLOVE at checkout for 20%

Be quick though - code expires at midnight on Oct 4th.

How to knit a log cabin blanket

A basic log cabin blanket block knit with leftover DK weight yarn on 4mm needles.

One of the things I love most about log cabin blankets is that you really are free to knit them however you like. Once you have the basics of the construction sorted out you can freestyle to your hearts content. They can be used to stashbust and use up scraps or you can purchase to fit a particular design -  the choice is yours. This tutorial will show you how to knit a square log-cabin block which is the building block for most types of log cabin blanket construction.

To start with you need to knit a central patch - garter stitch is by far my preferred stitch for this as the squares lie flat and don't roll. I have seen spectacular log cabin blankets knit in seed stitch but that's a a level of commitment I'm really not prepared for.

BLOCK 1

Cast on 15 stitches and knit 30 rows and then cast off - you will have 15 garter ridges. If it helps, stick a bulb or safety pin into the right side to help you although technically at this stage but sides are the same. If you get into the habit of slipping the first stitch purlwise (with the yarn in front) this creates a neat slipped stitch edge and will make the job of picking up stitches later so much easier.

Starting block 2 - with stitches picked up along the side of block 1

BLOCK 2

With colour 2 (green, here) align block 1 with the right side up and the cast on edge towards you. Pick up and knit 15 stitches along the left hand side of block 1. Knit 29 rows - the pick up and knit row counts as 1 row - until you have 15 garter ridges. Cast off.

Starting block 3 - with stitches picked up along the side of block 2 and the cast on edge of block 1

BLOCK 3

With right side facing and colour 3 (light brown), pick up and knit 15 stitches along the left hand side of block 2 and then 15 stitches along the cast on edge of block 1 (30 stitches in total). Knit 29 rows - 15 garter ridges then cast off.

BLOCK 4

With right side facing and colour 4 (pale green), pick up and knit 15 stitches along the left hand side of block 3, and the other side of block 1. Knit 29 rows, Cast off. Spotting a pattern yet?

BLOCK 5

With colour 5 (gold), pick up and knit 15 stitches along the left hand side of block 4, 15 stitches along the cast off edge of block 1 and 15 stitches across the other side of block 2 (45 stitches in total). Knit 29 rows. Cast off.

This completes your first full block and you’ll see that block 1 is fully enclosed by the surrounding 4 blocks.

You can now continue in the same manner, always remembering to turn the work 90 degrees clockwise. You pick up stitches along the side of the block just worked and across to the end of the piece, adding more blocks as you go. You can keep going until the blanket is the desired size or you run out of yarn.

PIN FOR LATER

The Comfort Blanket KAL is back for 2024

Back by popular demand - the Comfort Blanket knitalong returns for what I think is the fifth year running. We started in 2019 and although we may have lost a year somewhere in the pandemic we are still going strong.

For the unitiated this is a KAL for those who have bought my e-book 'How to knit a mitered square blanket'.

On purchasing the e-book you get a link to a new-for-2024 dedicated Facebook group. The link to the Facebook group is on the back page of the e-book. The e-book also contains the pre-KAL information on yarn choices and blanket square sizes so that you have a little time for plotting and planning before we get started on May 13.

The KAL originally ran over a 4 week period but don't worry, I'm not expecting you to knit a blanket in a month. Instead each week we focus on a different aspect of knitting a mitered square blanket, giving you time to experiment and plan what will hopefully be a long-lived and much loved project.

If you are new to the joys of mitered square blankets allow me to pursuade you of some of the benefits:

  • perfect for stashbusting

  • allow you to play with colour

  • squishy garter stitch

  • no need for seaming - squares are joined as you go

  • endlessly adaptable - go as large as you like or make a small lap blanket

Convinced yet?

If you have any questions please just email me or pop a comment below and I’ll do my best to get back to you as soon as possible

Returning KAL’ers

If you took part in a previous years KAL or if you’ve bought the e-book before and are yet to get started, you are more than welcome to join the group too. Just keep an eye on your emails (the email you used when you purchased the e-book) and I’ll let you know as soon as the Facebook group is open for business.

Winter Footstep Socks

This isn’t quite how I planned my triumphant return to blogging after something of a hiatus.

I had a lovely post all planned out celebrating the 10th anniversary of the Winter Footstep Socks, my oldest design and the first one that I ever listed for sale.

It was a fabulous piece, all about 10th birthdays and how far we’ve come.

Then I checked my notes and realised that the design is actually 11 years old - not 10. Ooops!

At the tail end of this year I decided that I would reknit these socks in a contemporary yarn - the original socks have long since vanished (I have no recollection of where to) and I fancied a new pair of socks for me.

I had some gorgeous sock yarn from Dystopic Fibre in his fabulous Teal Woodcap colourway which I knew would make for a perfect winter sock, and I’d forgotten how addictive and how quick this lace pattern is to knit up.

A lot has happened in 10 (11) years and my life looked very different in January 2013 when these socks were released. On the one hand it feels as though it has passed in the blink of an eye, but on the other hand so much has happened that when I sat down to write it, it honestly felt a little overwhelming.

So I’m going to save you the emotional part and just wish my Winter Footstep socks a happy 11th birthday. There’s a link below in case you’d like to knit a pair of your very own.