This blog post was originally published in 2019. I have revamped it and edited slightly to take into account a few questions I received on it. If you would like a condensed version of this tutorial along with all of my handy hints and tips to knitting the perfect sock snake I have made them available as a short pattern download. The PDF is also available on Ravelry
Now, you know me - I love a bit of knitting efficiency and I like to knit socks in those spare in-between moments of travel and general hanging around. A recent long train journey meant that I got a bit carried away with the toe-up socks I was knitting. I normally knit around a 16” tube if I’m going to be adding a cuff and an afterthought heel but on this occasion I was engrossed in my Kindle, sipping my coffee and knitting away.
It was only when I got to my destination that I realised that I had in fact knitted close to 22” - practically the foot of sock number 2.
I was absolutely not going to rip out 6” of perfectly good sock so I decided to make a virtue out of a necessity and carry on to make a long sock snake. I had seen someone else on Instagram do this a while ago and the idea had stuck with me since then.
Step 1: knit your snake.
For toe-up socks (8-9” foot circumference, 4ply yarn and 2.25mm needles) I cast on 24 sts using Judy’s magic cast on - 12 on each needle - and work a standard sock toe with increases on alternate rows (to 64 sts). Then knit, and knit...and knit some more. I knit until the tube measured 31” from the cast on and then added a second toe at the other end.
Step 2: divide your snake in half and decide where you are going to snip.
I like to fold the sock flat and pick the midway point - mark it with a pin. Then unfold it and lay it flat in front of you. Using a tapestry needle and waste yarn, slide 1 full round of stitches onto the waste yarn. Repeat with a second length of yarn - leaving one round between each lifeline
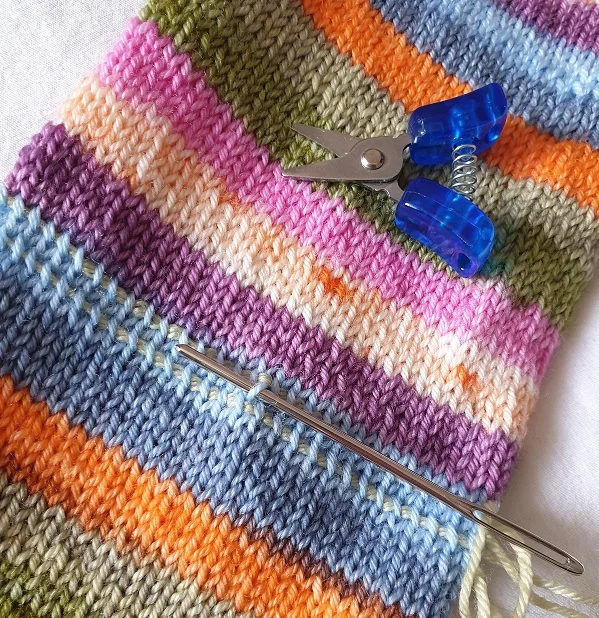
Step 3: Snip (it sounds less scary than cut)
Once your stitches are secure on your two lifelines they can’t go anywhere. Using sharp scissors - snip a stitch in between the two lines and gently unravel the yarn - I like to use the tip of the tapestry needle. Continue around the whole sock until your sock snake becomes 2 shorter snakes.

Step 4: Add cuffs
Return the live stitches to needles, join in your chosen yarn and add cuffs to the two tubes

Step 5: Add afterthought heels
Using the same lifeline process - just across 32 stitches though - add in afterthought heels.
And hey presto - 2 separate socks.

PIN FOR LATER