Designs

Introducing BOB - a basic sock for beginners

Meet BOB - short for "Build on the Basics".

This is a sock which is ideal for a beginner but also offers something a little different from the standard basic sock. If you want to try a cuff down sock without a heel flap and that doesn’t require Kitchener stitch to graft the toe - then you are in the right place.

This pattern is for a 64st sock - sized to fit a foot circumference of 9” 

Eventually this pattern, with expanded sizes and design options will become a paid pattern on Ravelry but just for now, I’m offering the basic version in weekly installments for your knitting pleasure. There is a pattern page there however for those of you that like to track your projects. The purpose of this post is to let you know what materials you need so that you can get started when the first installment comes out on Monday (June 19th, 2017).

Installments will be posted here and also on my Instagram account . If you want to save the installments to your Instagram 'collections' just click on the little bookmark symbol to the bottom left of your screen.

For these socks you will need:

Yarn: 100g sockweight yarn (4ply) of your choice -  Speckles or self stripe make the knitting more fun. 

Needles: I use 2.25mm Hiya Hiya sharp interchangables with an 80cm cable. We are aiming for a gauge of 32st and 44 rows to 4”. Please adjust your needle size if necessary to obtain correct gauge.

Skills: if you can knit, purl and knit 2 together you can knit these socks. There is a different type of stitch - the wrap and turn - at the heel but I’ll talk you through this.

 Technique: throughout the knitting of these socks I will be using the magic loop technique with 32 stitches on one needle and 32 stitches on the other. You are of course welcome to use your preferred method of small circumference knitting and I will give the directions for needle 1 (N1) which covers the 1st 32st, and needle 2 (N2) which covers the 2nd 32st.

I'm really excited to run this KAL in a slightly different format to my usual ones and I hope you are too. I'll be back on Monday with the first installment but if you have any questions please don't hesitate to ask.

How to work a rounded toe

A few people asked about the rounded toe on my latest sock - specifically about the fit. This is the best photo I have to show it but it is really comfortable. A little roomier than a standard toe but so far no complaints at all. And of course, the added advantage is that there is no need for Kitchener stitch. To work the toe was super simple too. On 64st:

K6, k2tog to end

K6 rnds

K5, k2tog to end

K5 rnds

K4, k2tog to end

K4 rnds

K3, k2tog to end

K3 rnds

K2, k2tog to end

K2 rnds

K1, k2tog to end

K1 rnd

K2tog to end

Break yarn and thread back through rem 8st using a tapestry needle. Pull tight and weave in end.


Morning Pages - a hug in shawl form

Morning Pages.

Now I appreciate that my timing may be a little off here but please indulge me. This shawl was originally conceived back in February but then had to be set aside for some commission work and it was a few months before it saw the light of day. As soon as it was finished though I knew that I just had to share it with you - because everyone needs a large worsted weight shawl in the middle of a summer heatwave - don't they?

It uses 3 skeins of the glorious Cumbria yarn (a worsted weight) from The Fibre Co and it was inspired by listening to the wonderful Kate of the A Playful Day podcast. She was talking about getting up early in the morning to work and write whilst her tot slept on, and even though my boys are a little older now, this is something I can totally relate to. Even now I often set the alarm for 5am to get my important tasks for the day out of the way before the rest of the house wakes. And our kitchen gets pretty cold in winter.

So, the Morning Pages shawl is a really generous, wrappable shawl which is technically semi-circular but is actually shaped like 3 sides of a square - but Ravelry don't have a classification for a three-quarters square. The garter stitch gives a great squishable texture and the contrast bands of stocking stitch really allow your chosen contrast colour to pop out. This is a great one to play with colour combinations and be a little adventurous.


A bit of perspective

I’m going to apologise in advance for this blog post which takes the form of a mini rant and isn’t in my usual style. If you’ve popped in looking for the knitting, please feel free to pass this one by and pop back tomorrow.

I’m well aware that in the knitting industry there is a perception that all knitters are lovely, and indeed the vast majority of them are. But there is a small but significant minority of knitters who I’m afraid are anything but. Now I am well aware that in saying this I am sticking my head above the parapet and I may well lose some customers or subscribers as a result. But I feel strongly about this and I feel that by pretending everything in the garden is rosy we are doing everyone a disservice.

What am I talking about here? One word - courtesy. Specifically courtesy when speaking to people online. It’s a well known fact that people behave different to each other online than they do in person and that comes as no surprise. What has surprised me though is the response to a recent event, where I offered a free copy of a shawl pattern if people signed up to receive my regular newsletter.

To recap slightly, I designed the Fuss Free Festival Shawl in conjunction with Fluph Shop and the Little Grey Girl for an Edinburgh Yarn festival collaboration. The shawl then went on general sale on Ravelry and I decided to offer it free for a limited time as an incentive for my email subscription. All was fine for several weeks and I had a steady stream of subscriptions, then by a stroke of fate the pattern appeared in the Ravelry news pages. By the wonders of Ravelry the shawl shot to the top of the Hot Right Now page and stayed there for 24hrs or so.

The volume of new subscribers became a flood and my poor email service struggled to keep up. Now I'm not for one second complaining about this. It was a huge boost to my mailing list and my profile and was very welcome. What did irk me though was the tone of some emails and messages I received from people trying to access their free pattern.

These are a selection of genuine emails I received during a 12hr period - anonymised for obvious reasons.

“I signed up to your newletter expecting to receive your pattern as promised. It has NOT arrived”

“I really want your pattern but haven’t got it yet. Where do I get it?”

“ Why don’t you just put the pattern free on ravelry and then I can get it from there. I don’t want to give you my email address”

“On ravelry you promised a free copy of the shawl pattern. I have not received it. Is this some sort of scam????

“My pattern has not arrived as you promised. Please rectify this immediately”

I kid you not. These all genuinely landed in my inbox. The sender of the last email proceeded to send 4 or 5 more in tones of increasing anger at 1 hour intervals. Ending with a threat to report me to the unspecified authorities for fraud. Unfortunately they were in a different time zone to me and I was asleep.

Now obviously, people may get frustrated if they don’t receive something they have been promised. But on the Ravelry page and the subsequent email chain I did explain in detail how to access the free pattern. I think the Mailchimp did get a bit overwhelmed at one point and so the automated responses may have been a little slow, which didn’t help.

But the immediate reaction, to dash off a hasty and yes, rude email shows a basic lack of courtesy and a lack of appreciation that they are dealing with a real life human being. A real person who has worked an 8-hour day outside the home. A real person who has dealt with homework crises, mundane domesticity and a dead washing machine. A real person who is presently trying to achieve the impossible of 8 hours quality sleep.

I did receive many lovely thank you messages too - which outnumbered the rude ones by quite some amount. I’m not asking for sympathy and I’m aware that in the scheme of things this is a very small thing.

Nevertheless I feel it shows a real lack of awareness on the part of a very small number of people. I’m sure that none of those people would have been intentionally rude to me in person, but put a keyboard in the way and their communication style was very different. And at the end of the day, this amount of angst over something which can be purchased for just under £3.50 (around $5) seems to be lacking somewhat in perspective.

Courtesy. A small word but such an important one. Please and thank you cost nothing whether you are speaking online or in person.

There, rant over.

As you were.

How to create a slipped stitch shawl edge

If you have knit the Fuss Free Festival Shawl you will have noticed that it has a slipped stitch edging which helps to give it it’s distinctive relaxed crescent shape. Whilst it is isn’t difficult to work a few people contacted me for help as they found it hard to visualise how the stitches should look.

So to help I thought I would just create this mini tutorial just to show how the stitches are slipped.

To start with, all slipped stitches in the pattern are slipped purlwise, by which I mean that you insert the right hand needle tip into the first stitch on the left hand needle as if you were going to purl it.

The instructions say to Sl 1 pwise wyif - ie to slip 1 stitch purlwise with the yarn in front. To do this you start with the yarn hanging down at the front of the work. Leaving the yarn where it is, insert the right hand needle tip purlwise into the first stitch on the left hand needle and slide it across to the right hand needle. You don’t knit it or do a yarn over - the stitch is simply slipped, unworked to the right hand needle.

Then, move the yarn between the two needle tips to the back of the work ready to work the next stitch.

The next stitch is an increase - where you knit into the front of the next stitch, pull the loop through on your right needle tip but don’t slip it off the left hand needle. Instead, insert the RH needle tip into the back of the same stitch. Pull the loop through onto the RH needle tip and then slide both stitches off the LH needle. This creates an increase.

The next stitch is slipped purlwise in the same way as the first. So bring your yarn between the needle tips to the front of the work and then slip the stitch purlwise.

I hope this helps you to visualise the beginning of the shawl. Once you get into your rhythm you will find it to be a relaxing and fun knit - I promise.

Tips for a straight-edged sock yarn blanket

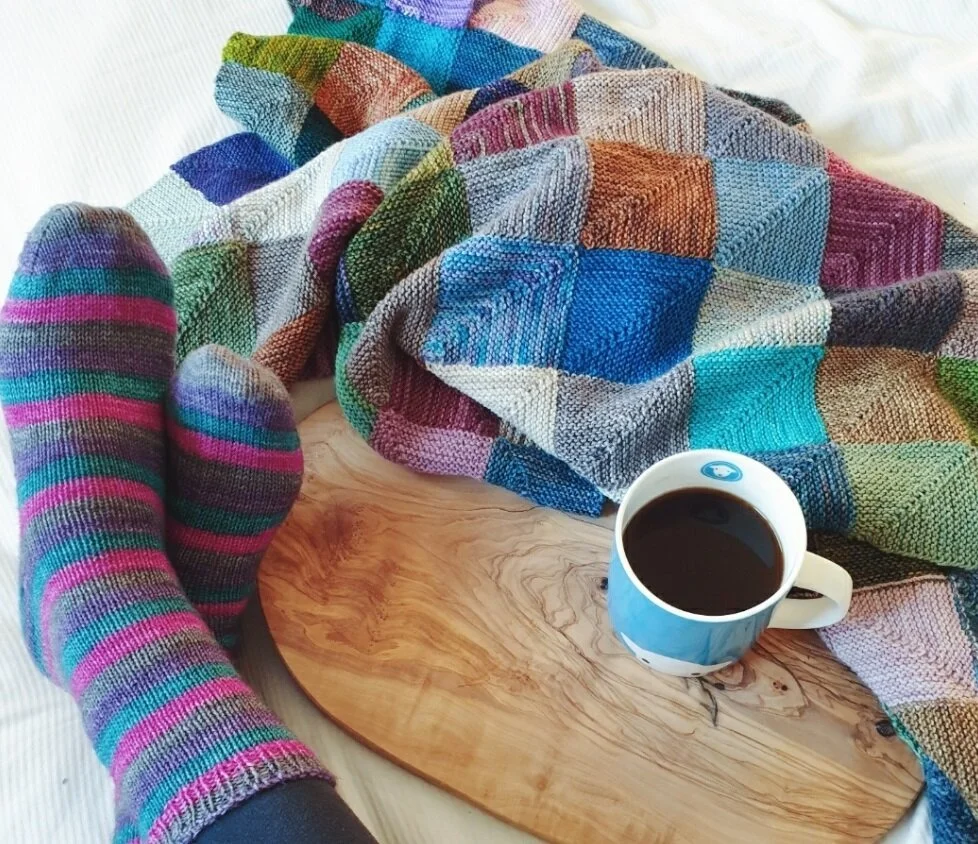
Since sharing photos of my sock yarn blanket I had a few questions asking how I was constructing it. Some patterns have you create a baseline strip of squares to start with. This is a good way to do it but it does mean you have to decide on the width of your blanket right at the very start.

Some patterns also have the squares worked in such a way that the edges of the blanket aren't straight - leaving a zig zag appearance. This can look really lovely but it does leave you the dilemma of whether to leave the edge as it is or work a series of 'infill' shapes to straighten things out.

I decided to work my blanket outwards from a corner, turning the 1st square on the diagonal to pick up stitches along the top right side for square 2 and the top left side for square 3. By continuing in this way you end up with a lovely straight edged blanket and you can keep going until the blanket is as large as you like. Or by continuing to work on one side and not the other you can create more of a rectangle than a square.

However you work your blanket though one thing is for certain. It's nothing if not addictive.

OTHER MITERED SQUARE BLOG POSTS YOU MIGHT ENJOY:

Two different mitered square decreases

How much yarn do you need for a mitered square?